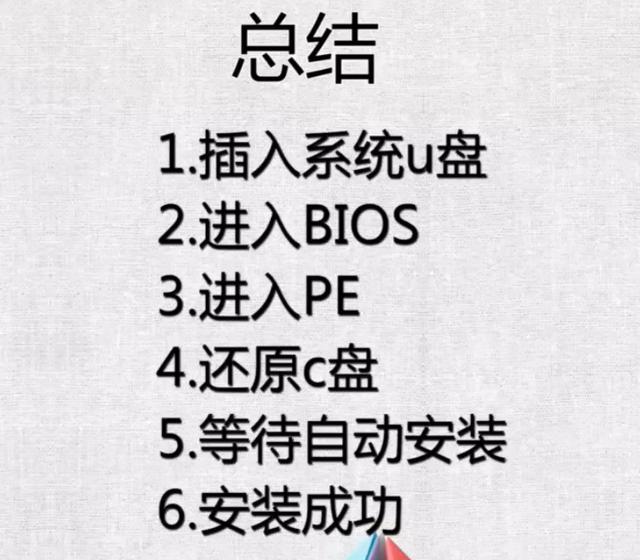
笔记本u盘装win7系统教程
(笔记本u盘装win7系统教程图)
u盘重装系统win7步和详细教程,u盘装win7系统

首先插入下一个系统的u盘进入系统启动选项
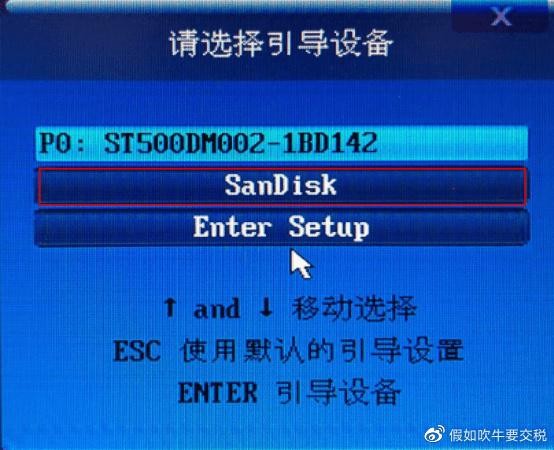
选择u盘启动
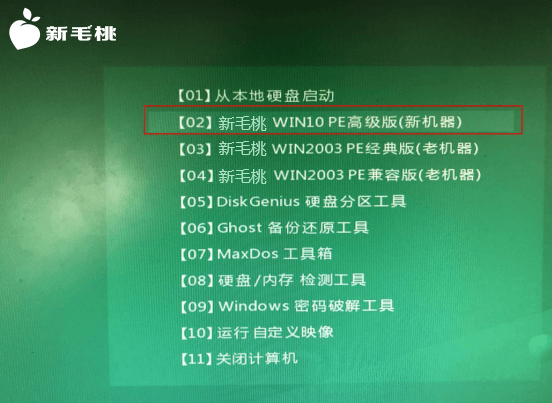
点击进入pe
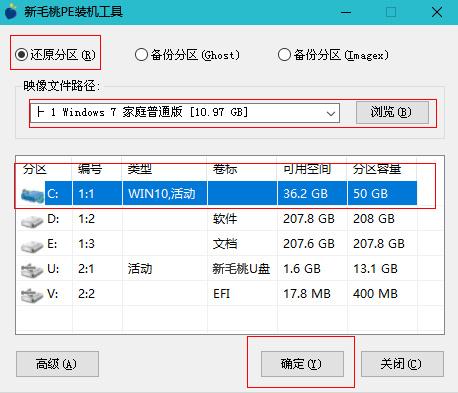
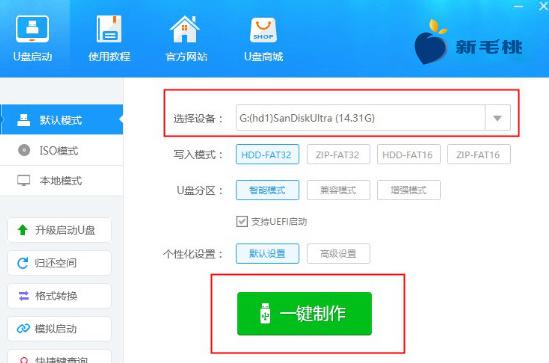
打开安装工具,找到u盘的镜像文件
选择确定选择点击确定
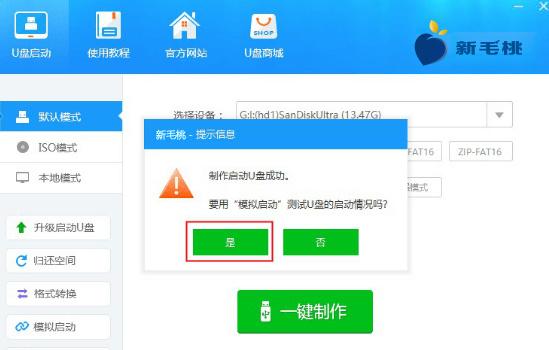
让我们耐心等待吧
软件更新:
与上一版相比,界面进行了优化,因此更加简洁、清晰;
2、在iso在模式中,步骤优化,步骤减少,生产速度更快;
3.保留官网文章和论坛导航,方便用户查找相关文章和反馈问题;
4.功能增加U盘分区,然后支持windows平板电脑启动,给用户更多的选择,更人性化;
5.个性化设置板更清晰,用户可以在一键制作按钮上看到并提前更改。