联想u盘自带软件
(联想U盘软件)
Windows 10(简称Win10)发布多年,重装更新方法多如牛毛。对于联想电脑用户,原厂提供的纯版本Win10是首选。现在联想已经发布了Win原厂镜像,纯无预装软件。
据联想所说,\\"联想原厂系统镜像\\"目前,该程序只适用于联想或联想ThinkPad品牌的64位Win其他型号或系统在安装后不能保证自动激活,请仔细选择。
此外,该程序是纯版本的系统镜像,只包括操作系统的重新安装,系统中没有预装软件(如Office)。
其他重新安装的过程没有什么,需要准备一个以上的8GB、小于32GBU盘,备份所需数据。

以下是联想官方保姆级重装原厂纯版Win10系统教程,主要下载联想官方提供的8MB重新安装大小的小工具。
Step 1 制作系统U盘
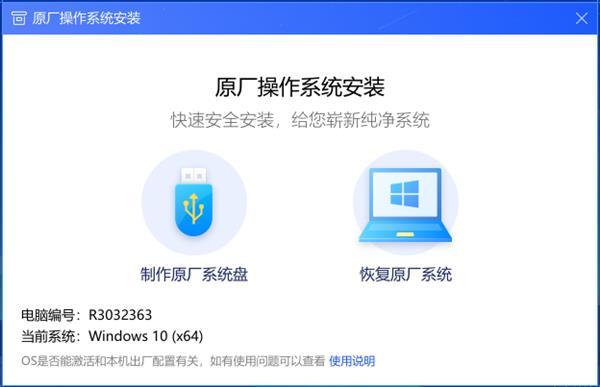
·a. 在需要重新安装系统的计算机上下载联想原厂系统镜像程序
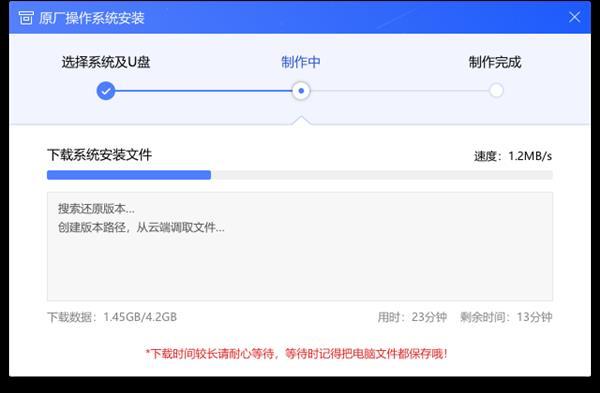
·b. 插入准备好的U盘,打开联想原厂系统镜像程序,点击制作原厂系统盘
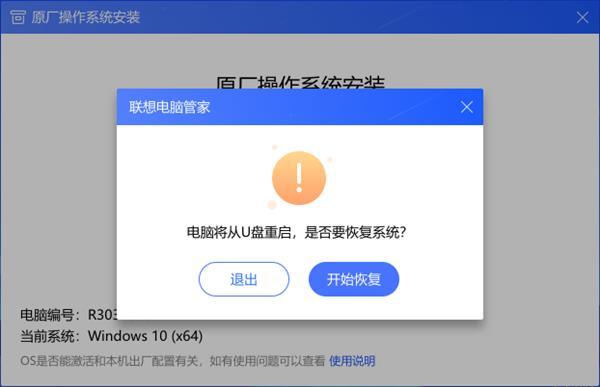
如已制作好安装盘,可直接点击恢复原厂系统,然后点击开始恢复直接到第f步
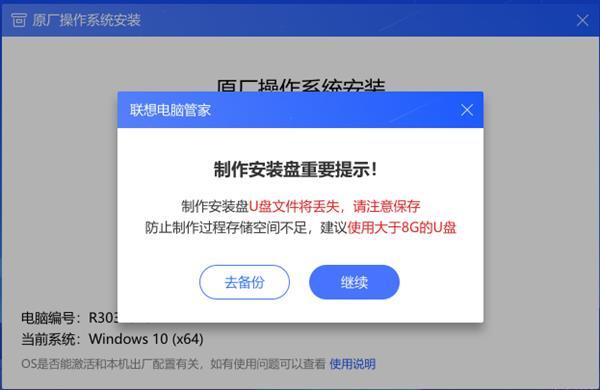
·c. 如果U盘已经备份,直接点击继续;如果U盘尚未备份,点击备份,备份后重复上述步骤
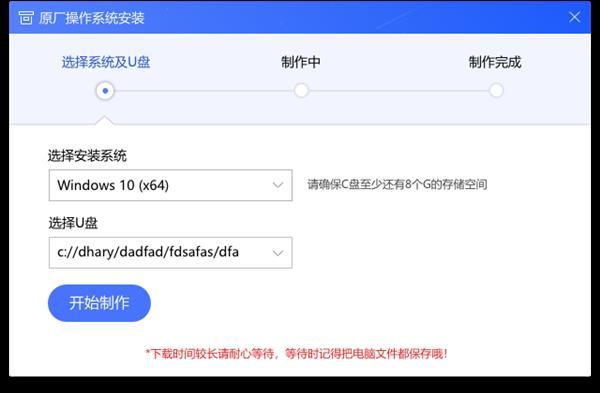
·d. 点击上图继续后,正式进入U盘制作阶段。
选择安装系统-默认,无需选择;
选U盘-请确认这里是准备好的U盘,确认后,点击开始制作
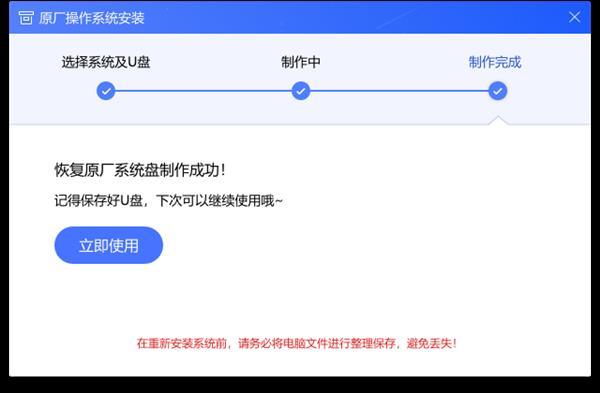
·e. 制作完成后,点击立即使用。
 选择安装系统-默认,无需选择;选U盘-请确认这里是准备好的U盘,确认后,点击开始制作
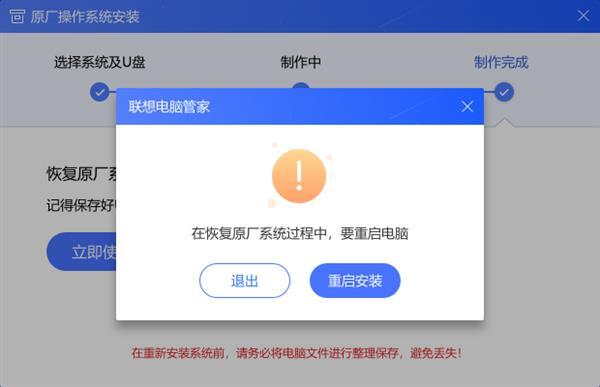
·e. 制作完成后,点击立即使用。再次提醒:重新安装系统前,一定要备份重要的计算机文件!
·f. 然后点击重启安装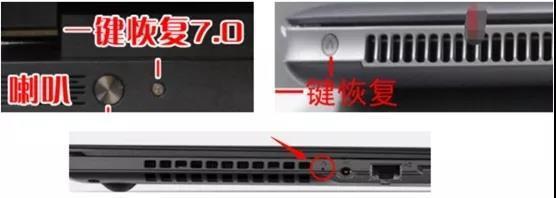
Step 2 安装Windows
 ·如果计算机能正常重启,请跳过a、b两步,直接看c步·a. 如果计算机无法重启,则无响应:按下电源键,并在启动过程中不断敲击F12键或者Fn F12键调出引导菜单。如果笔记本电脑没有响应,也可以按下一键恢复按钮或戳一键恢复孔。一键恢复按钮或小孔位置多在开机键旁边或电脑左右侧,如下图所示:
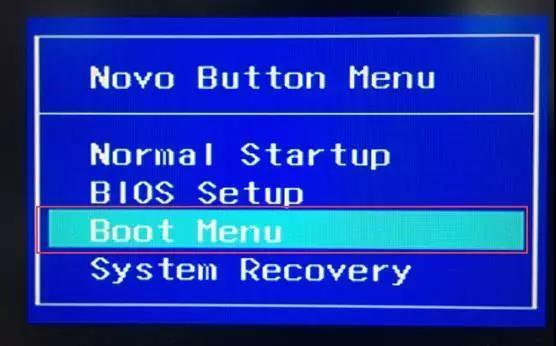
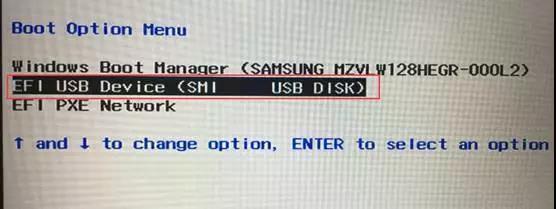
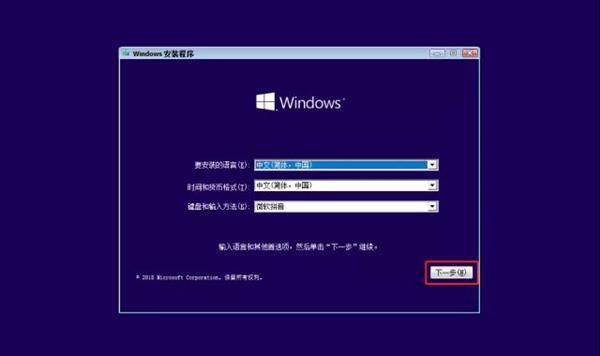 ·b. 选择“Boot Menu按下返回按钮,选择带有启动菜单的[USB]的选项,再次按下回车
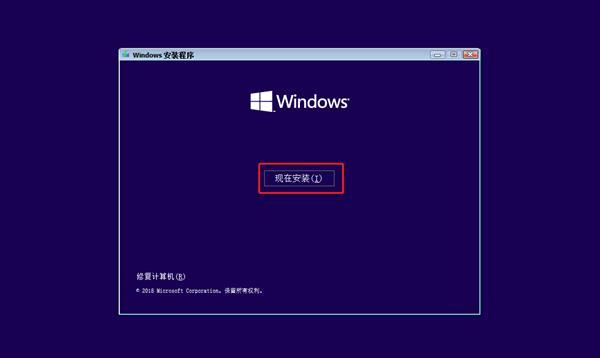
 ·c. 此处直接点击下一步
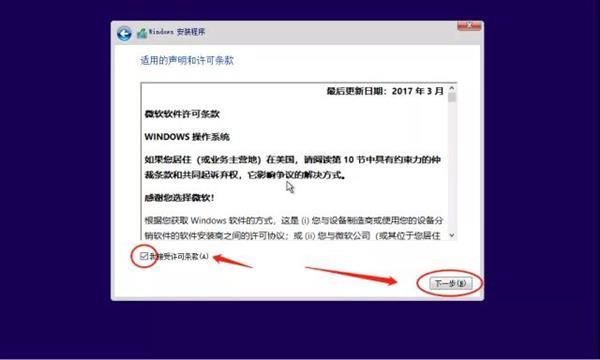 ·d. 点击现在安装
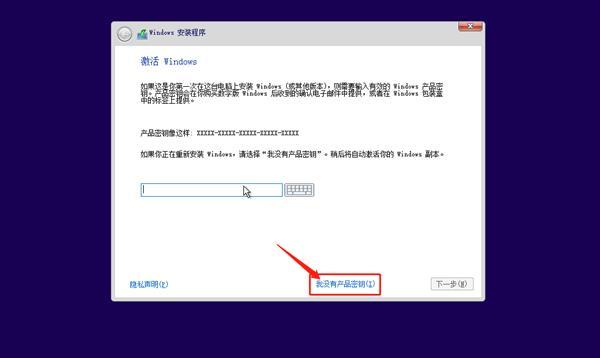
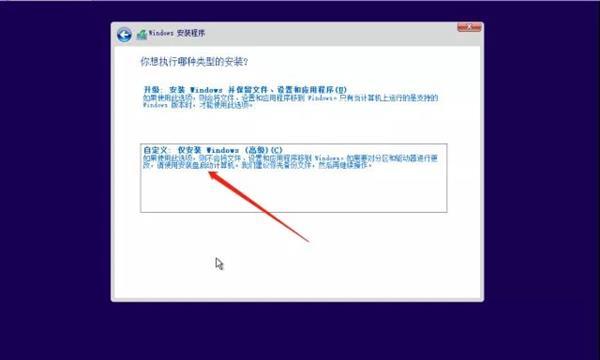 ·e. 点击我没有产品密钥
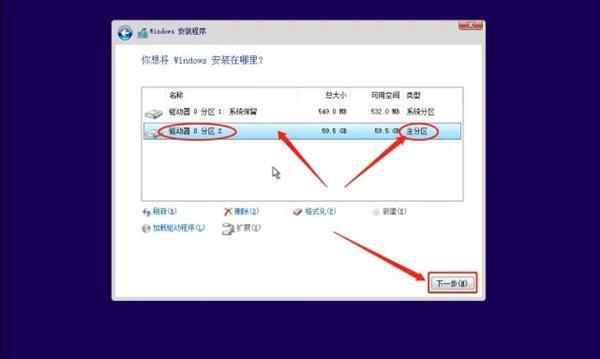 ·f. 勾选我接受许可条款,点击下一步
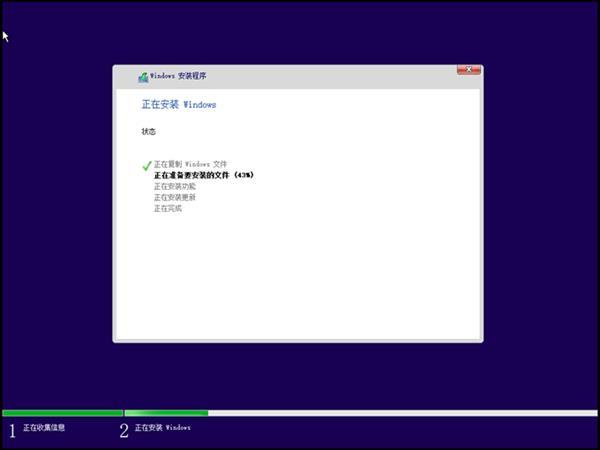 ·g.点击自定义·h.注意选择主分区或删除需要安装系统的磁盘(删除后会变成未分配),直接点击【下一步】·i.此时,系统将自动重启并安装几次,请耐心等待。