win7原镜像u盘安装教程
(安装u盘镜像win7系统教程)
u盘安装原版win7系统,今天先教你u盘启动和下载系统教程
先打开浏览器,然后百度搜索老白菜回车,选择第一个打开


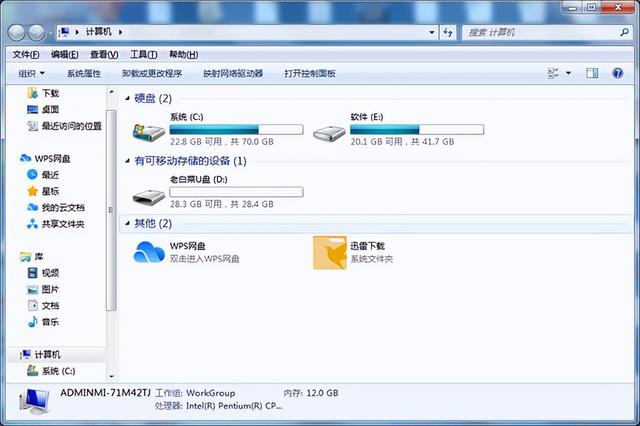
双击本地下载,准备16g上述空u盘,然后将u盘插入电脑u口
下载老白菜装机版,打开后操作,然后点击选择u盘
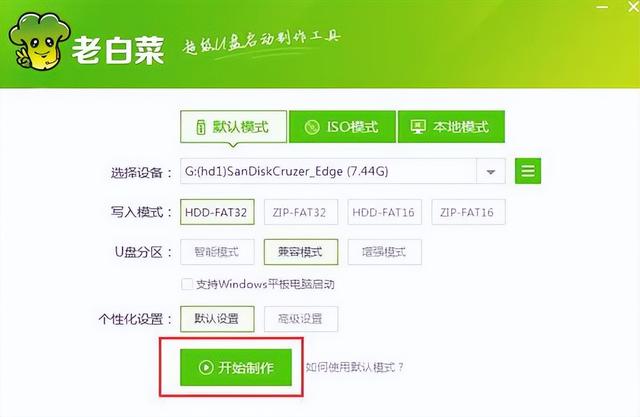


点击制作确定,等待u盘完成。
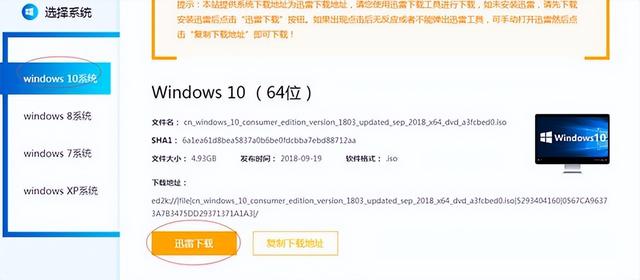
在制作u盘启动盘时,您可以先下载系统镜像
选择win点击下载7系统win7,64位系统
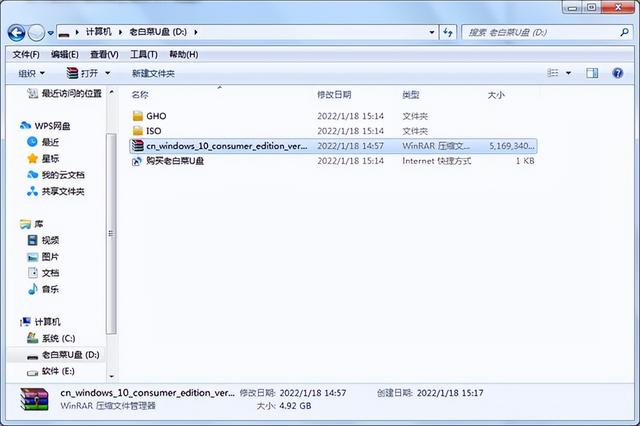
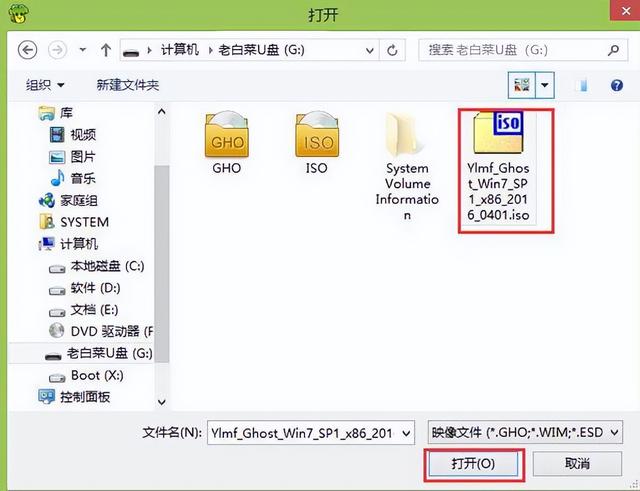
下载后,将镜像复制到u盘根目录下,等待复制,u盘就制作好了
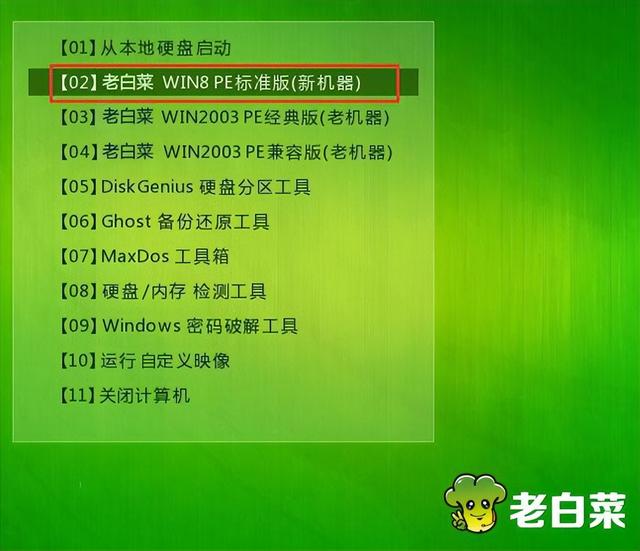
然后重新启动计算机。当启动图片出现时,引导u盘通过使用启动快捷键启动到老白菜主菜单界面,选择02老白菜Win8PE回车确认标准版(新机)。如下图所示
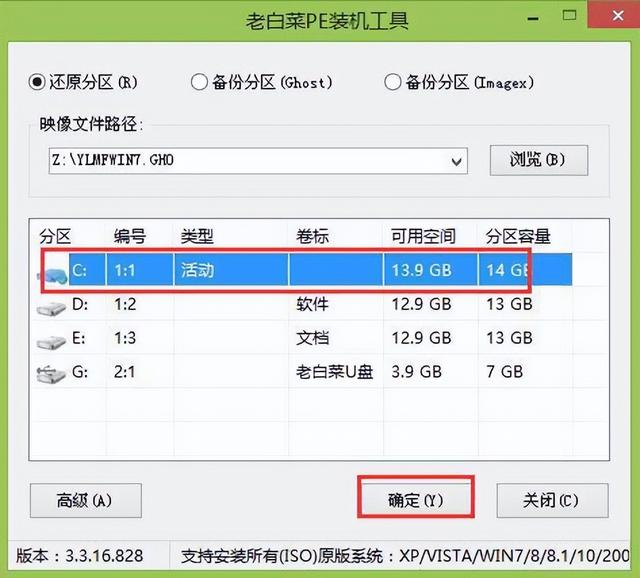
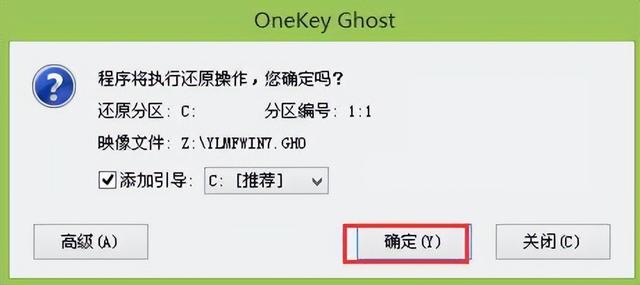
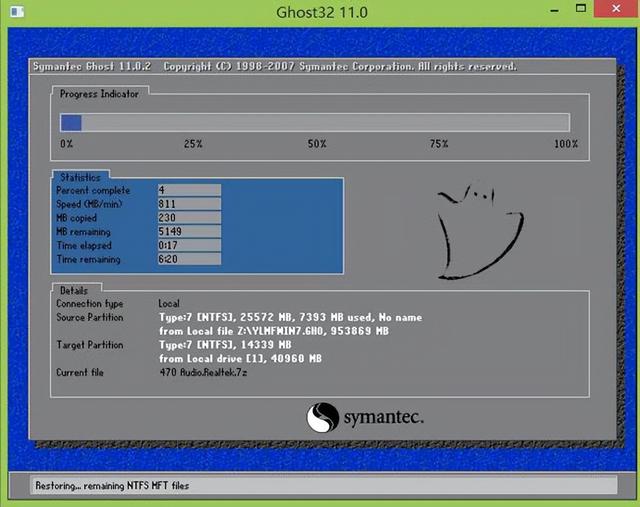
登录旧白菜装机版pe系统桌面会自动弹出老白菜PE点击浏览装机工具窗口(B)进入下一步。如下图所示
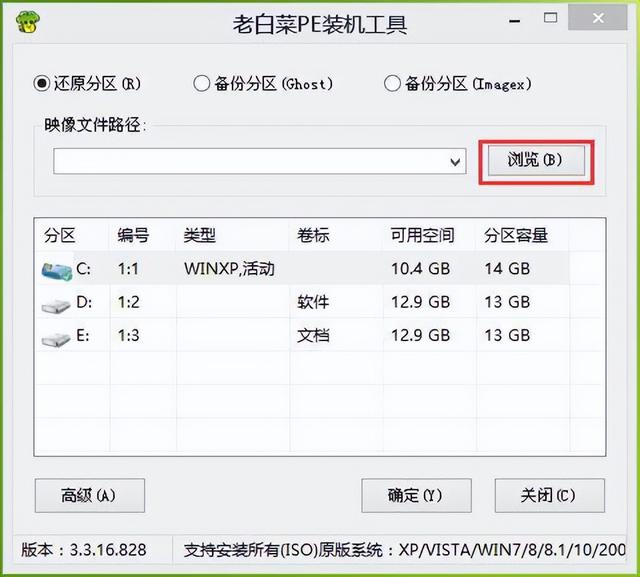
 登录旧白菜装机版pe系统桌面会自动弹出老白菜PE点击浏览装机工具窗口(B)进入下一步。如下图所示