如何使用pe安装win10
(如何使用pe安装win11)
如果电脑没有安装系统,等待没有灵魂,只是一个装饰。通过U盘PE微软原版系统安装WIN10。首先要准备好工具。
1.优盘(这里推荐16G并且已经做好了PE不会做的优盘PE看看这个教程:
制作PE教程。
2、WIN10 ISO文件。
能上网的电脑。
一、去微软官方下载WIN百度搜索框搜索10系统:windows官方下载,找官方网站打开。
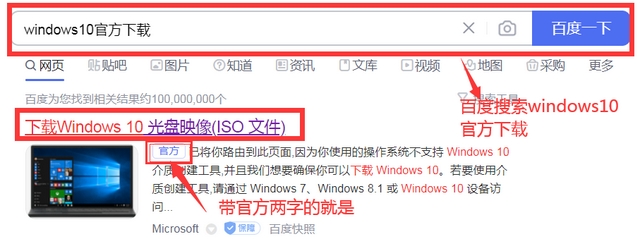
百度搜索
点击下载找到(立即下载工具)。

WIN10下载工具
保存下载目录,点击下载按钮。提示:下载速度取决于网速。[微笑]

存放目录
下载后,双击打开WIN10下载工具。
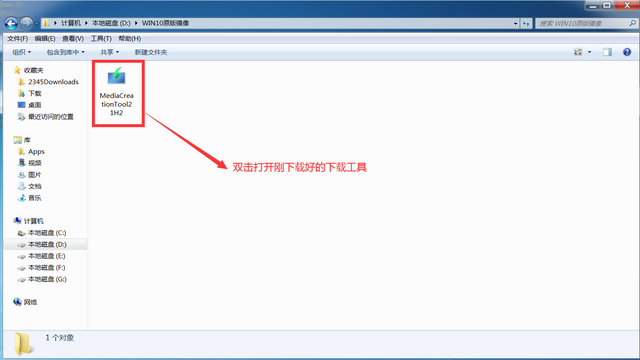
WIN10下载工具
打开后点接受。
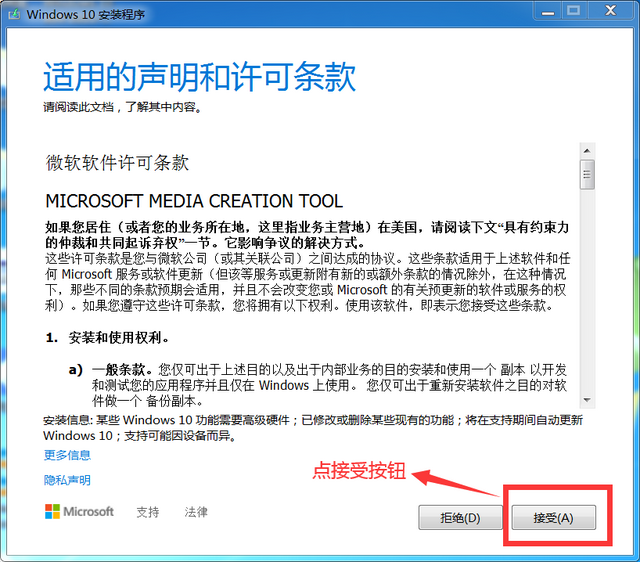
接受下载界面点
选择第二项,为另一台计算机创建安装介质。点击下一步。
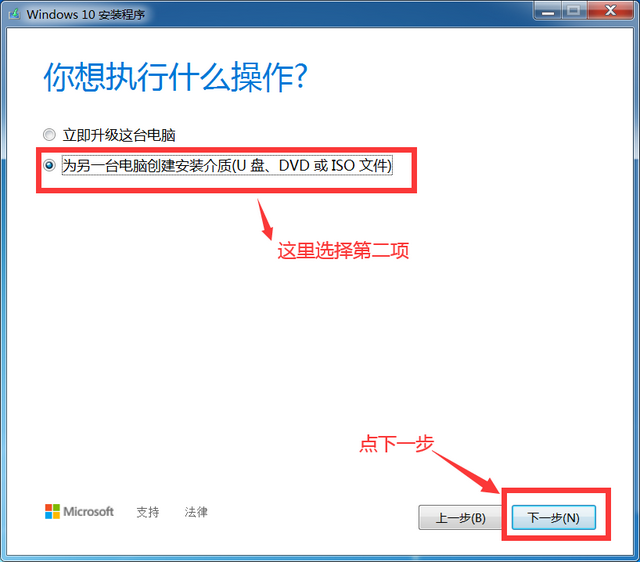
下载需要的ISO文件
选择语言,体系结构和版本选择,默认是按照电脑配置推荐选项,需要其它语言、体系结构和版本,把推荐对勾去掉,就可以更换。如图:
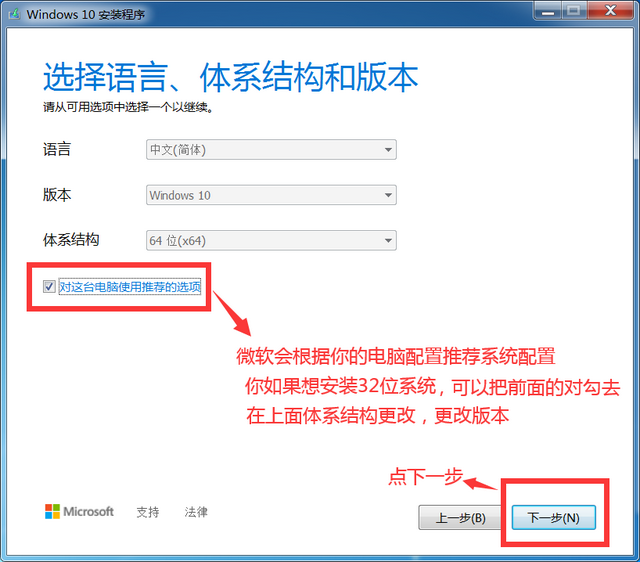
选择版本

选择所需版本
选择ISO文件。点击下一步。
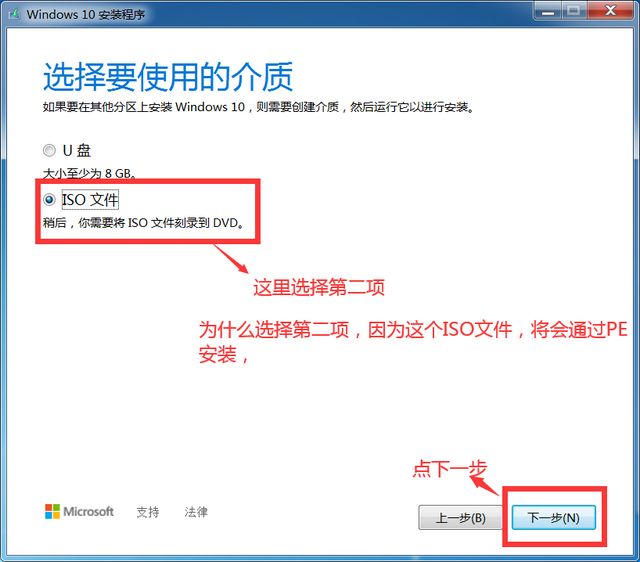
ISO文件
设置ISO文件存储目录。点击保存。
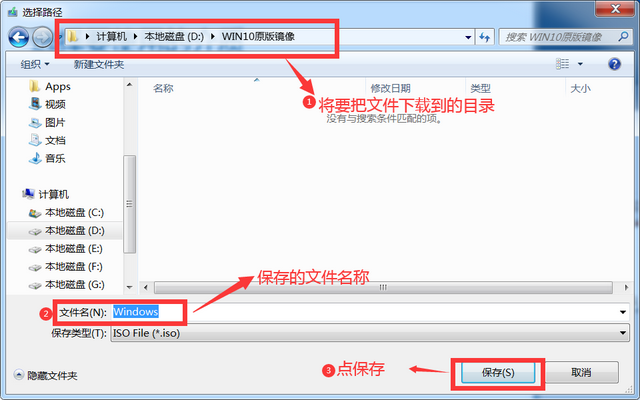
ISO文件存储目录
开始下载,在这里等一段时间下载,下载速度与网速有关,耐心等待。[困]
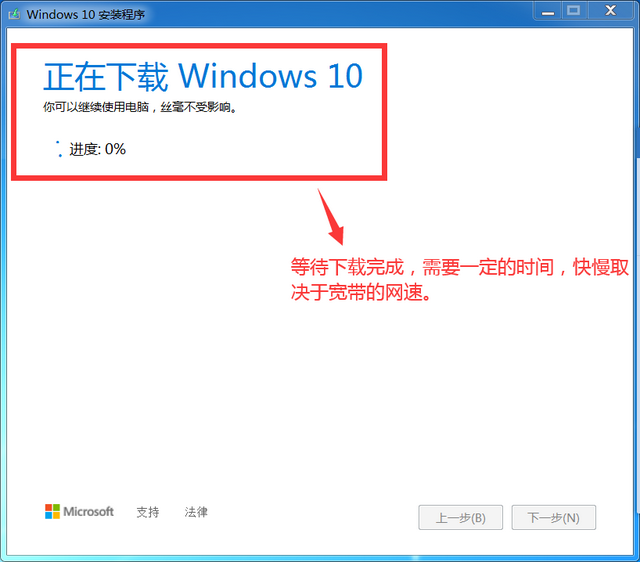
下载当中。。。
下载完成后。点击完成。
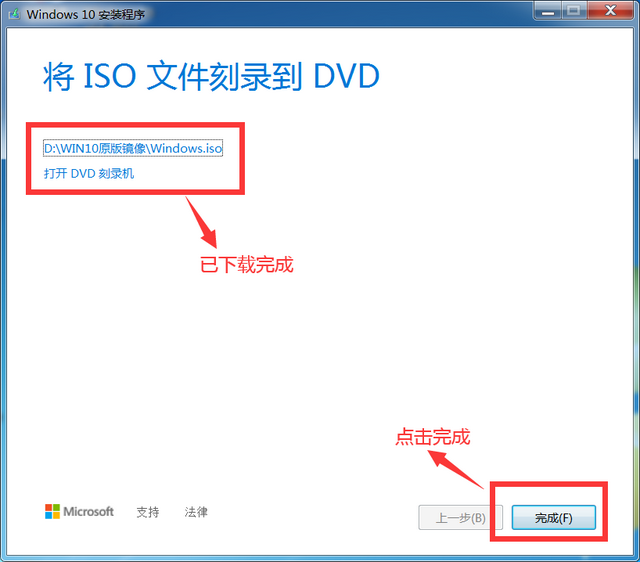
下载完成
下载到这里WIN10系统完成了,不是很简单吗?第二步开始。[憨笑]
将优盘插入电脑USB口上,下载好的ISO复制粘贴已完成的文件PE优盘中。
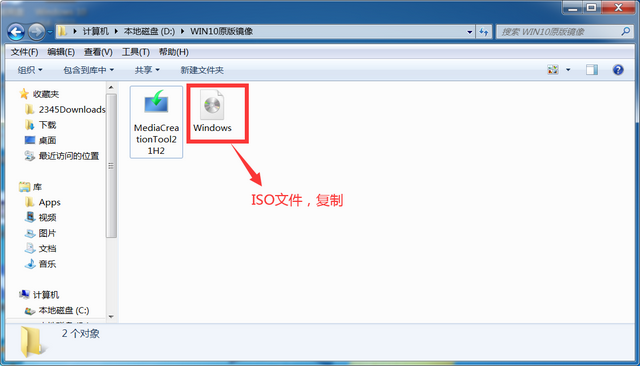
复制ISO文件
复制过ISO文件粘贴后PE优盘中。

粘贴到PE优盘
三、插入需要安装的优盘WIN在10系统的计算机上,按下热启动键。直到出现在这个界面(如图所示)。按键盘右下角上下键调整USB HDD:KingstonDataTraveler 3.0(金士顿优盘USB3.0)。按回车(Enter)。
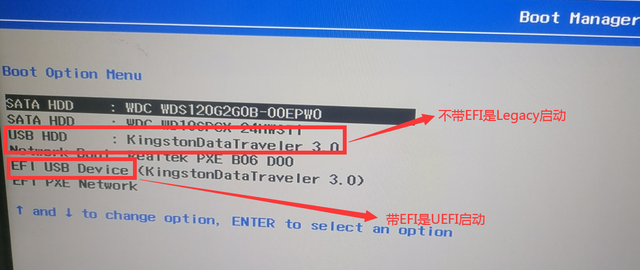
选择界面启动项
不知道热启动键,下图是热启动键的参考。
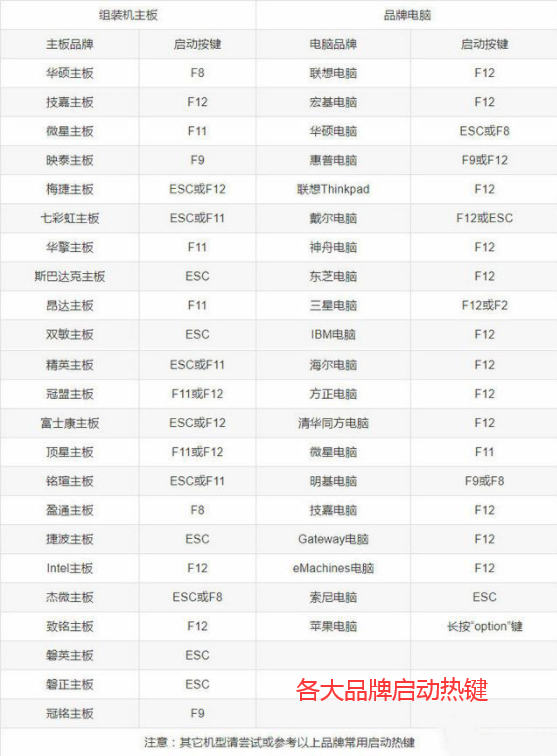
参考热启动键
以Legacy启动。选择要进的PE系统。

PE界面
点击菜单,选择虚拟光驱打开。
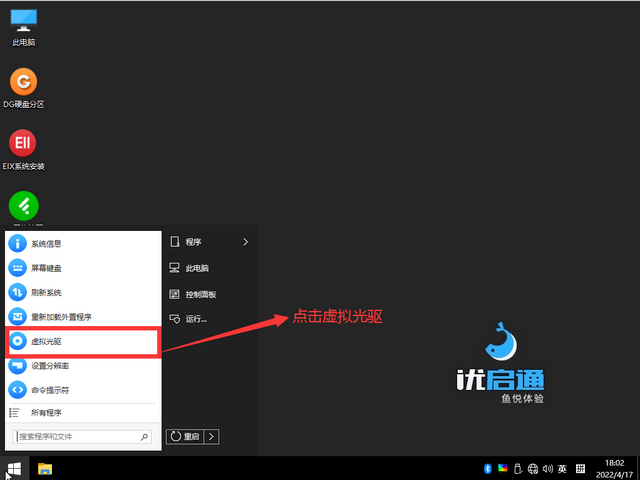
打开虚拟光驱
装载优盘里WIN10 ISO文件。
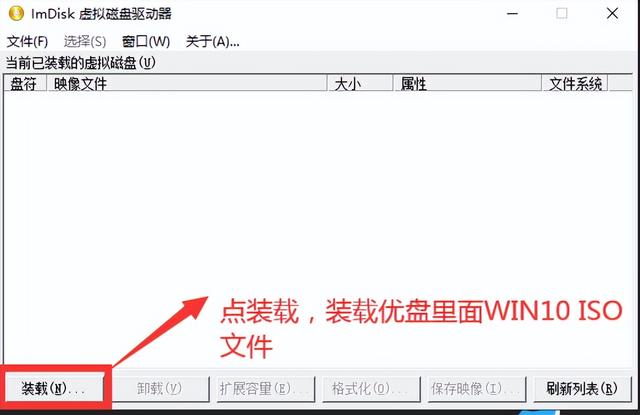
虚拟光驱
打开优盘中WIN10 ISO文件。
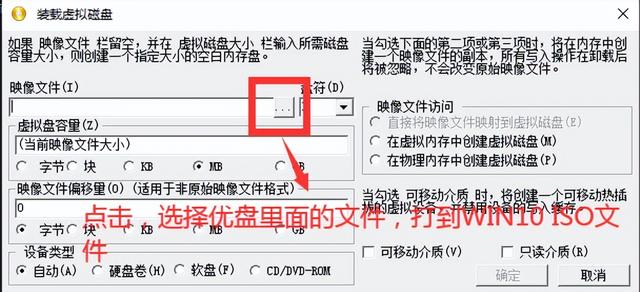
打开WIN10 ISO文件
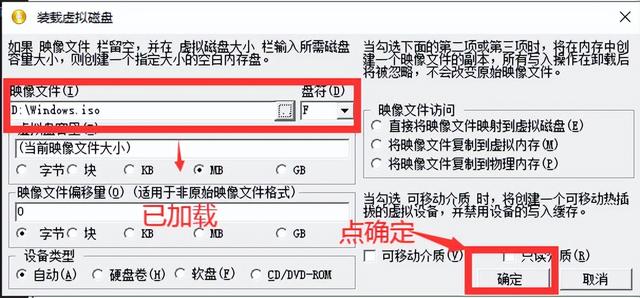
已加载WIN10 ISO文件
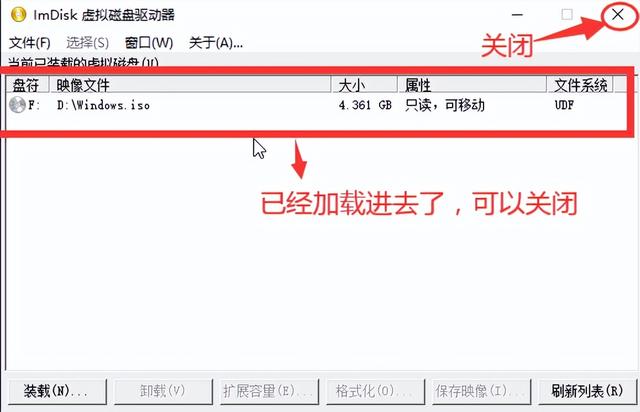
加载好的ISO文件
打开电脑,找到虚拟光驱打开。
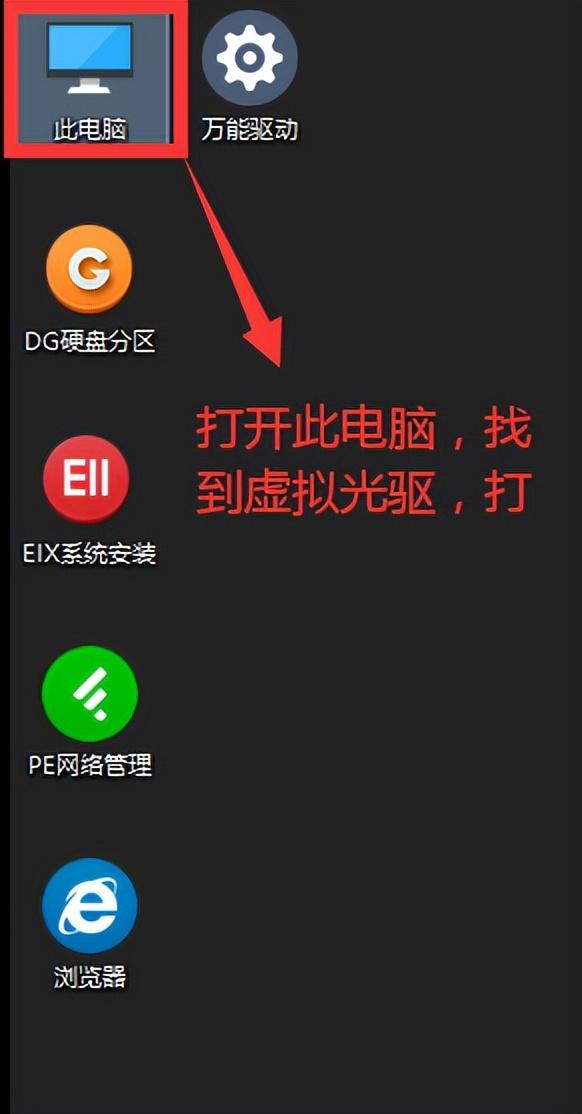
打开此电脑
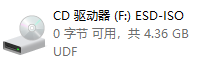
打开虚拟光驱
打开会出现WIN安装界面,终于到了安装界面。一步一步开始安装。[笑][笑][笑][笑]
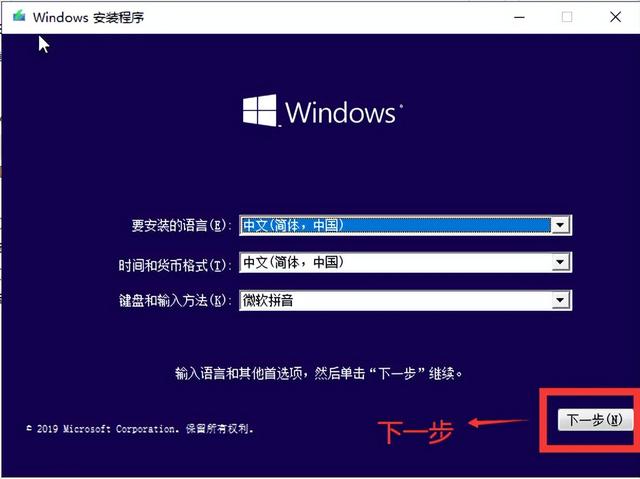
安装界面

现在安装
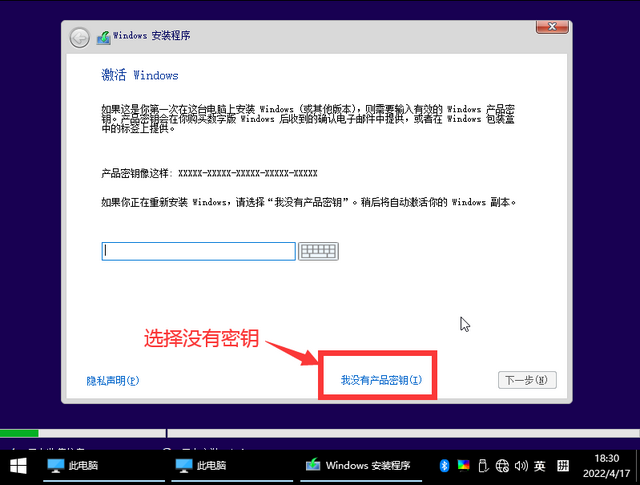
选择没有密钥的
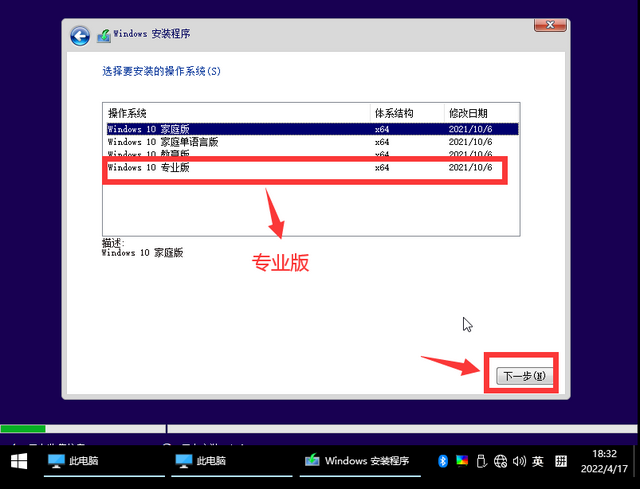
专业版是最高版
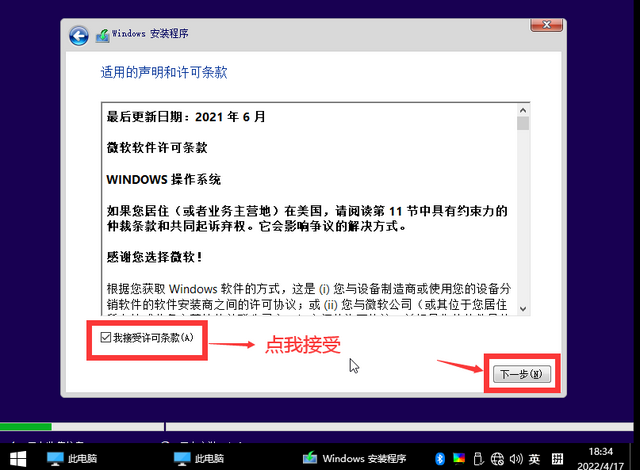
接受条款
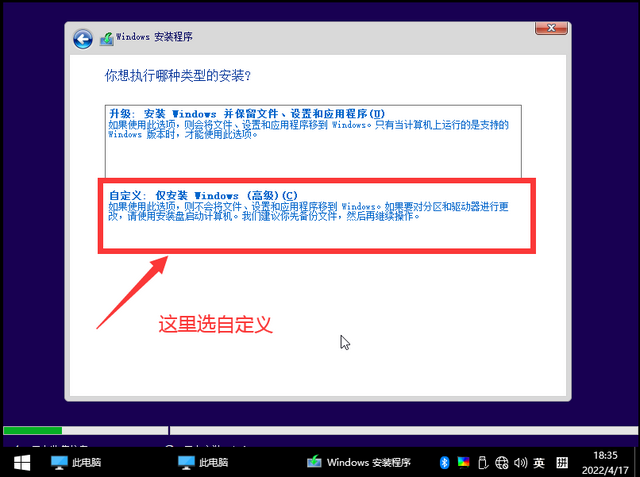
自定义安装
硬盘分区,点新建给WIN10分出一个安装分区,俗称C盘(主分区)。
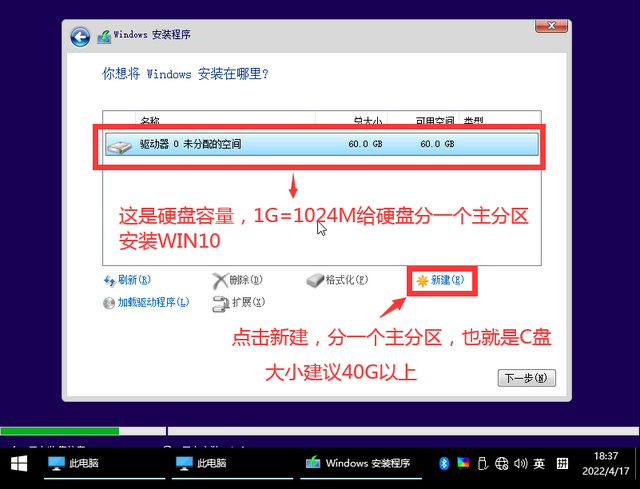
分区界面
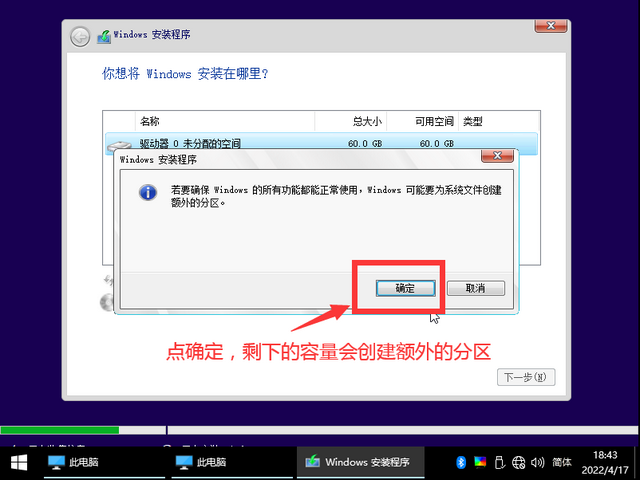
创建额外的分区
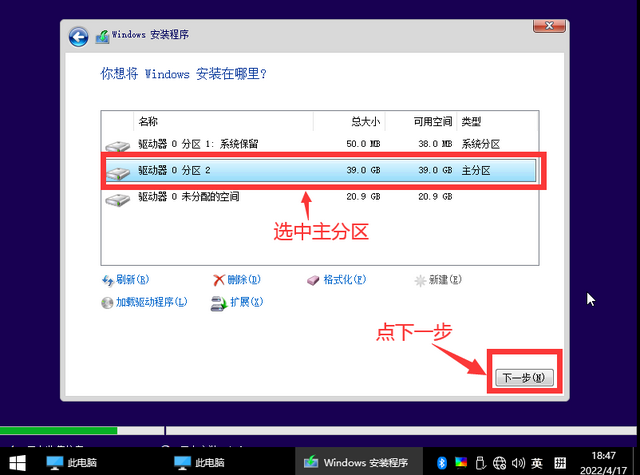
选择主分区开始安装
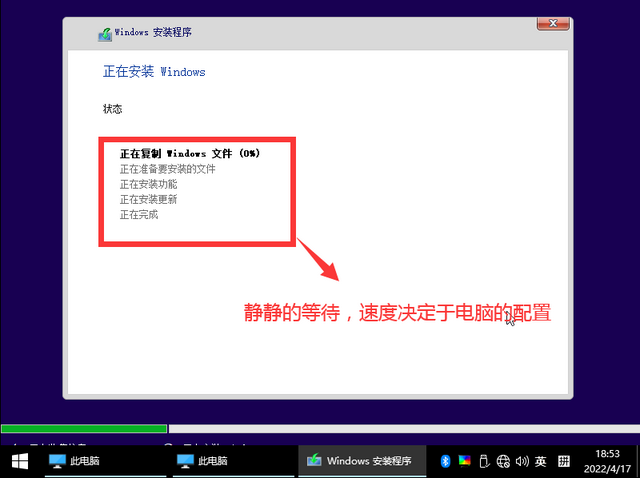
等待安装完成
安装后,计算机将自动重启。电脑屏幕黑屏后,将优盘从电脑上拨下,电脑将继续安装windows文件。默默等待。[晕]
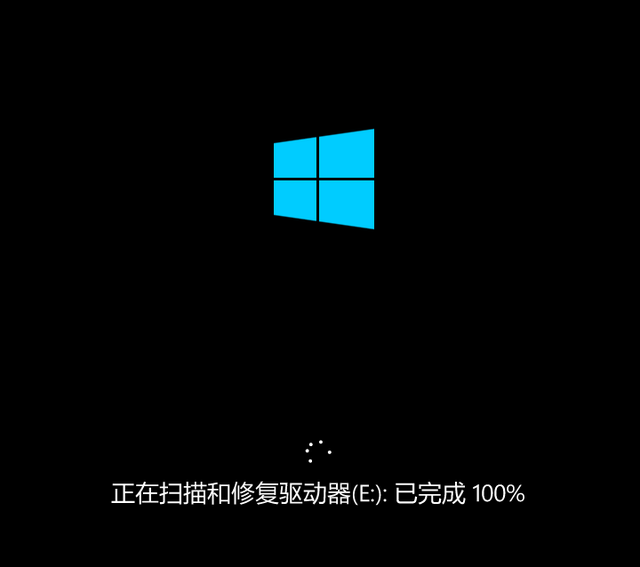
安装WIN文件
安装后,系统将进入设置界面。
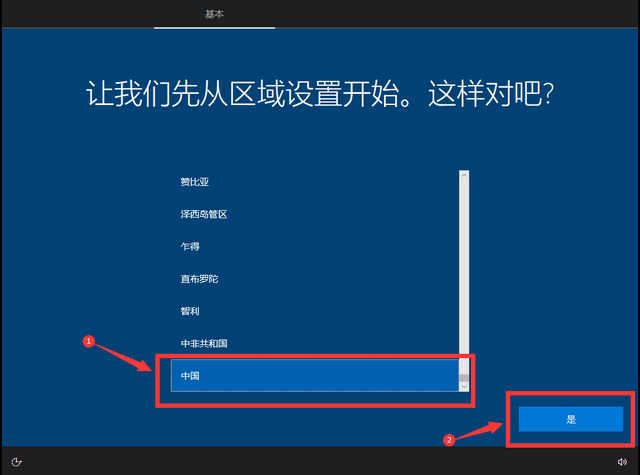
设置界面

默认键盘布局
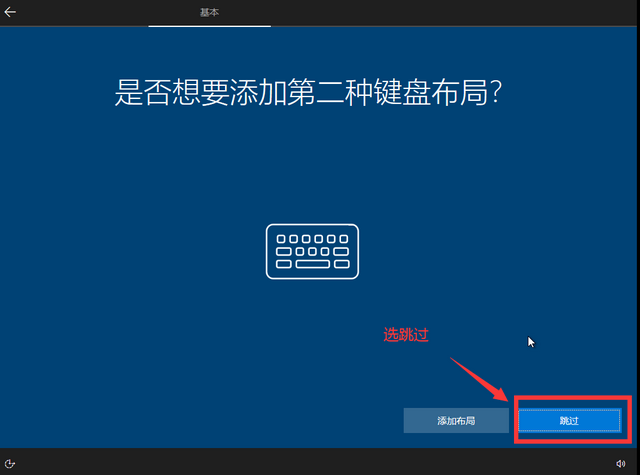
布局不需要添加
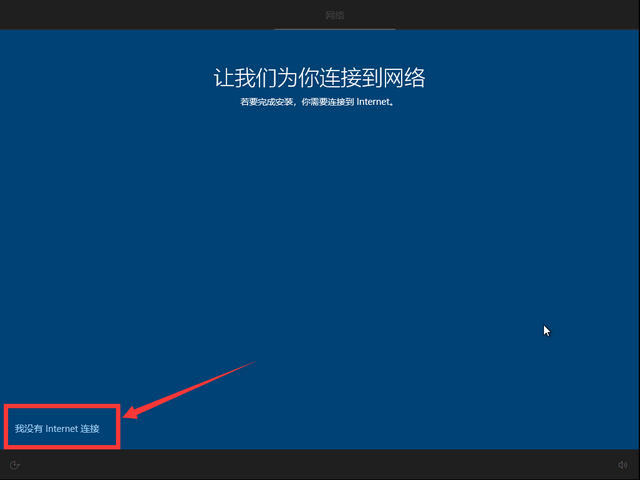
选择我没有网络
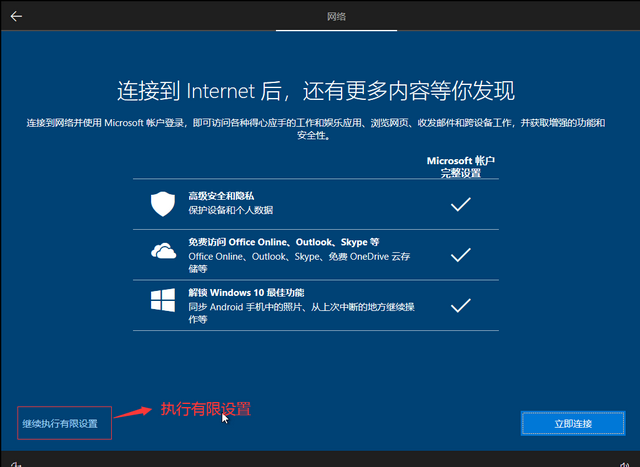
有限设置
设置帐户名,推荐大小字母作为帐户名。

设置帐户名
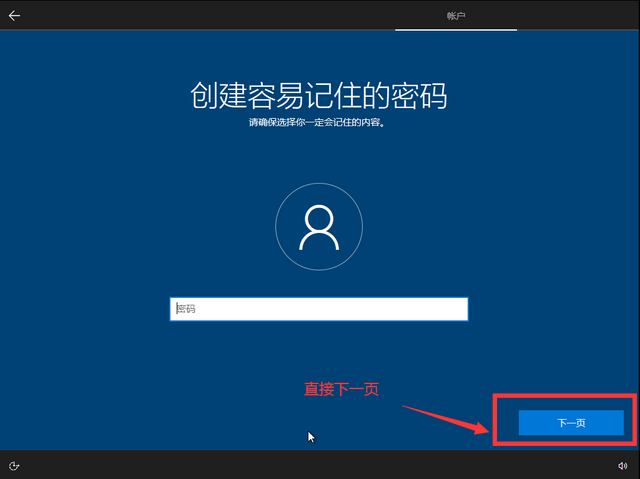
设置密码界面
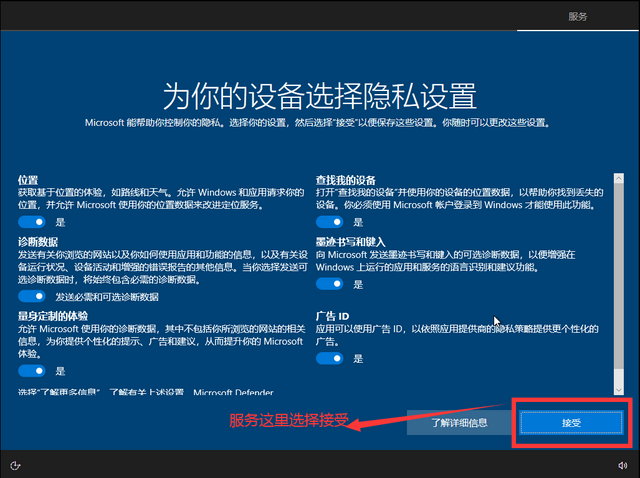
选择接受服务设置
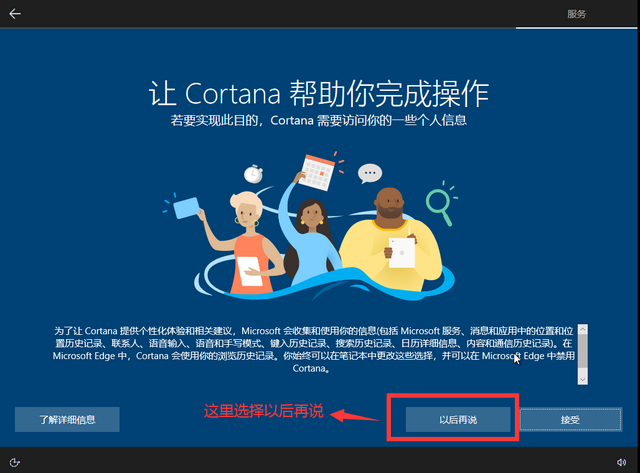
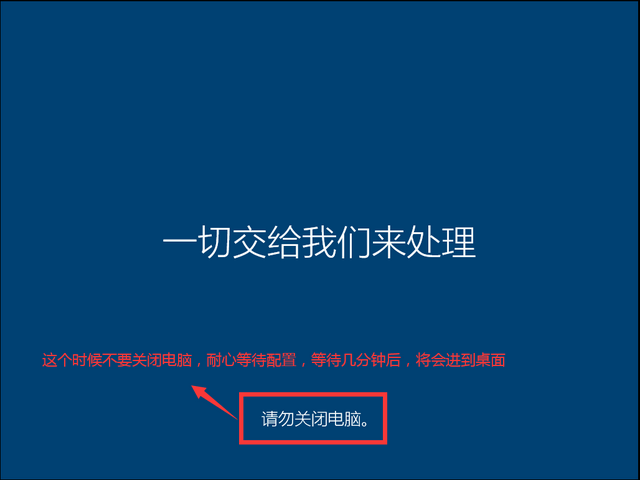
请勿关闭电脑
配置后,将直接进入桌面。[哭泣]
进入桌面进行基本设置,并建立新的额外磁盘分区空间。
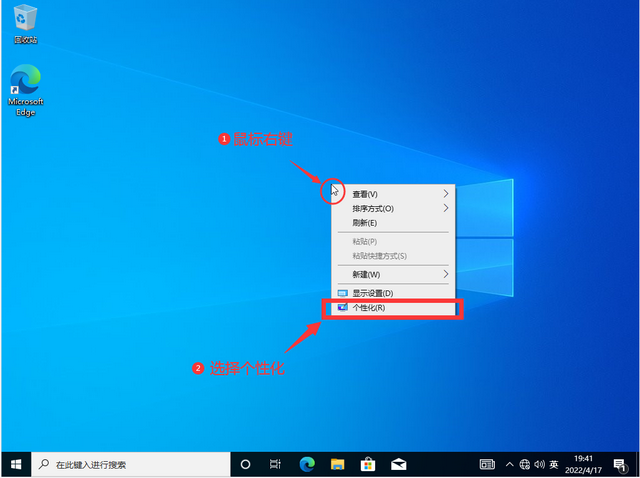
个性化
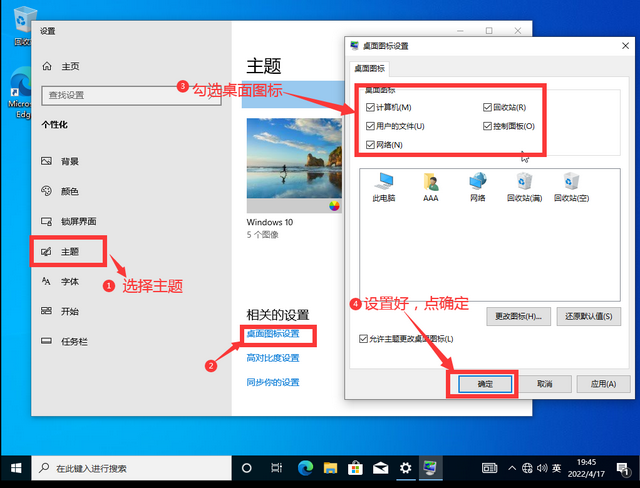
桌面图标设置
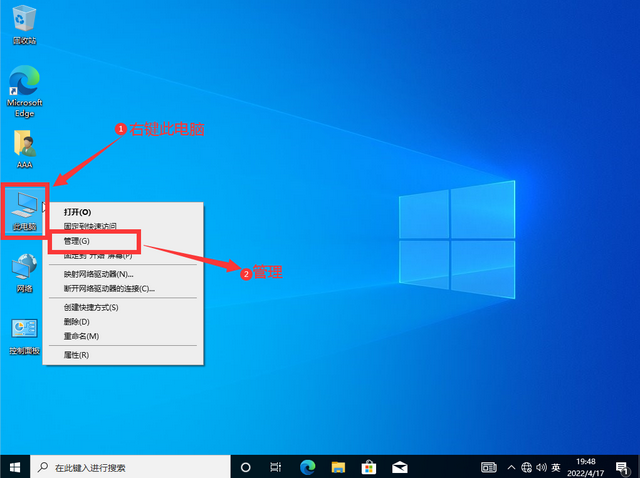
磁盘分区
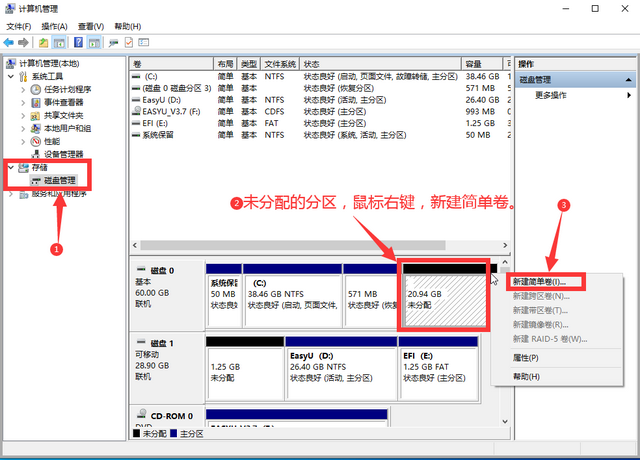
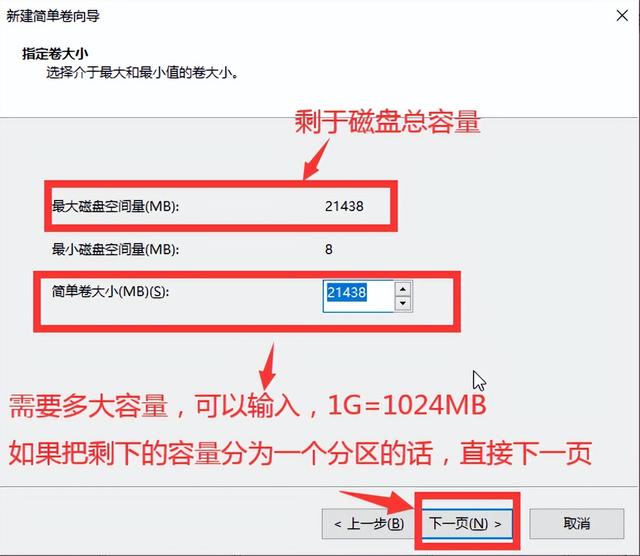
新建分区

新的额外磁盘容量界面
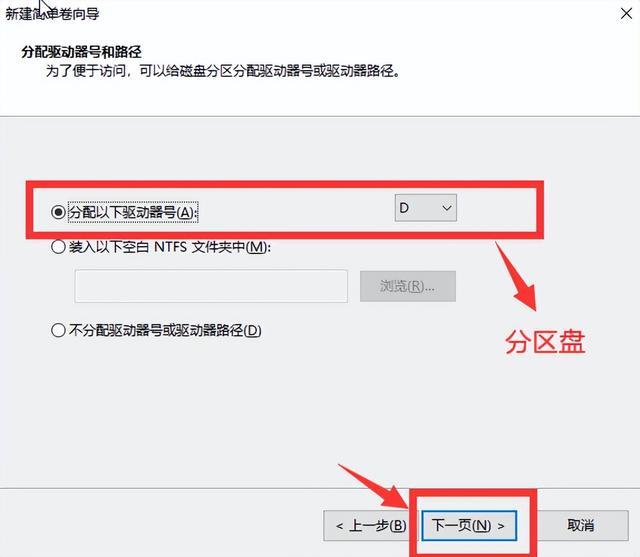
盘符
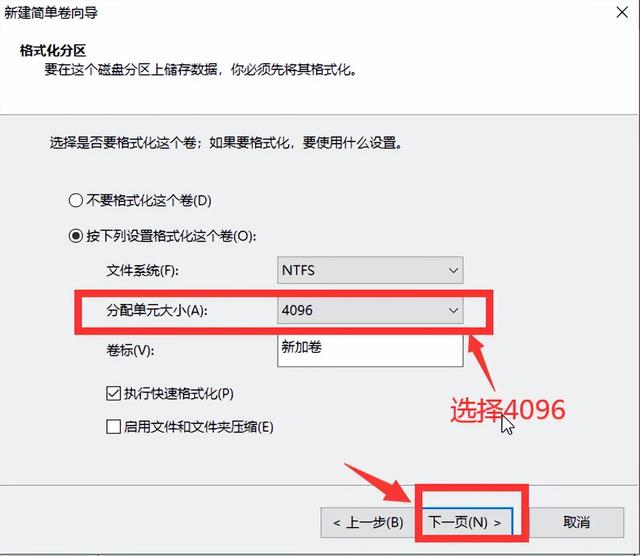
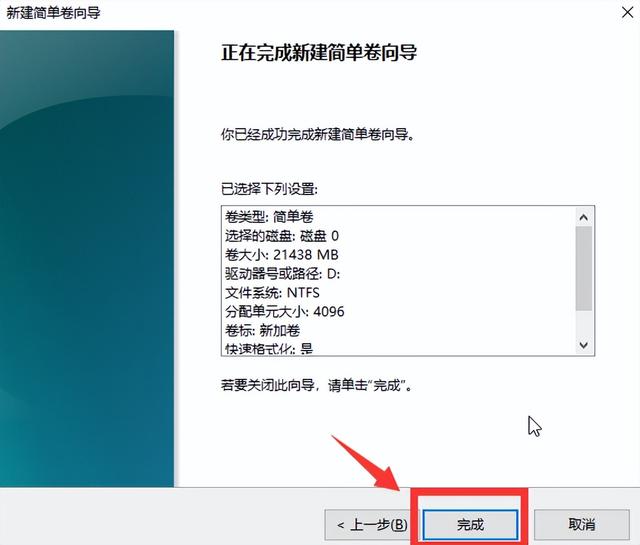
完成
WIN10系统安装完成。
四、WIN10安装完成后,必须安装驱动器。不安装硬件驱动器是不可用的。安装驱动器的方法有很多。首先,插入网络电缆,WIN10系统微软将自动下载并安装基本兼容驱动。第二,使用第三方软件,如驱动精灵、驱动生命、鲁大师等。最新安装最新驱动器。第三、针对自己的电脑硬件去官网下载最新最稳定的对应驱动下载,也是推荐的方法,虽然麻烦,这样装好的驱动更为兼容稳定。
用PE安装系统的好处:1.即PE计算机维护优盘,也可以正常存储文件。2.电脑程序坏了,可以进去PE复制系统中的重要文件。3.兼容性高,基本适用于市场上所有电脑。
OK!以上就是PE中WIN10微软原版安装全过程。[尬笑][尬笑][尬笑]