电脑店怎么装iso格式的系统
(电脑系统iso如何安装格式文件的系统)
工欲善其事,必先利其器”
安装系统分为五个步骤,内容有点长,耐心看完
1、PE获取系统生产和工具
2.获取系统镜像
3.安装关键驱动器
4.安装系统组件
5、系统激活
第一步:制作PE系统
好的技术离不开好的工具。让我们先找到一个纯净易用的PE系统,这里推荐给大家:系统总裁@系统总裁网(www.sysceo.com)从安装系统到制作制作系统镜像的工具全面
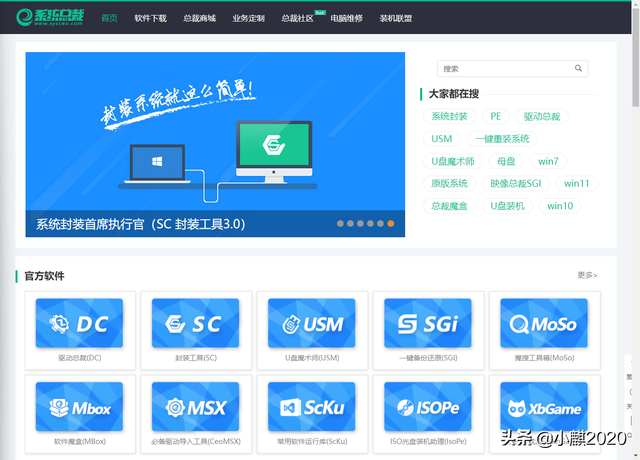
系统总裁官网
找到我们需要的第一个工具,U盘魔术师

官方分为四个版本
区别可见下图官方介绍
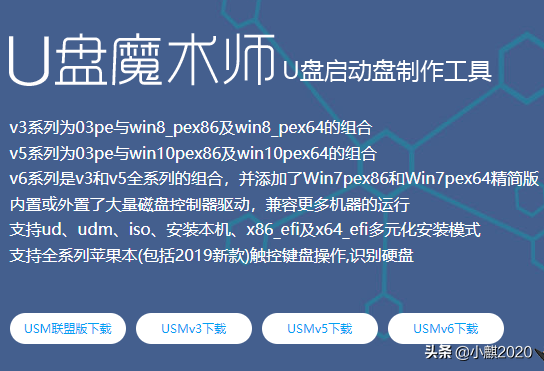
版本选择
USM联盟版,USMv3版,USMv5版,USMv6版
我们可以选择2018年以前的机器V3版本,2018年以后的机器可以选择V5或V6版本
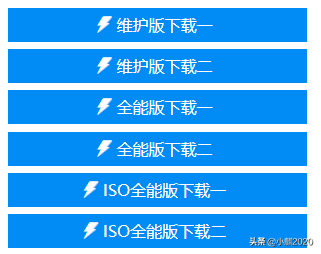
下载方式
根据上图,我们可以选择维护版或全能版
然后回到系统总裁的主页,下载第二个工具驱动总裁(没有广告,不限速)

也可以进入主板官网下载主板厂商提供的驱动

驱动下载
同样,官方也给了我们三个版本,这里小编建议选择万能网卡版,防止安装系统后没有网卡驱动,其他驱动驱动无法安装
下载版本
小编建议直接下载EXE打开版本可直接使用,无需解压
再次回到官网主页,下载第三个工具,软件常用运行库ScKu(C ,DX组件等系统必须依赖文件)

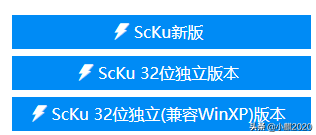
这里小编推荐下载第一个 ScKu新版

还可以顺便下载一个软件魔盒,安装软件无捆绑,适合电脑小白

下载以上软件后,私信小白:系统激活
获取系统激活工具
然后往下看,今天的主角需要天的主角,一个纯系统镜像(没有任何捆绑的官方镜像)
有三种获取方法
1.微软官方获取
百度搜索windows10官方镜像或windows11官方镜像
注意网址,避免踩雷
官方网站:https://www.microsoft.com/zh-cn/software-download/windows11
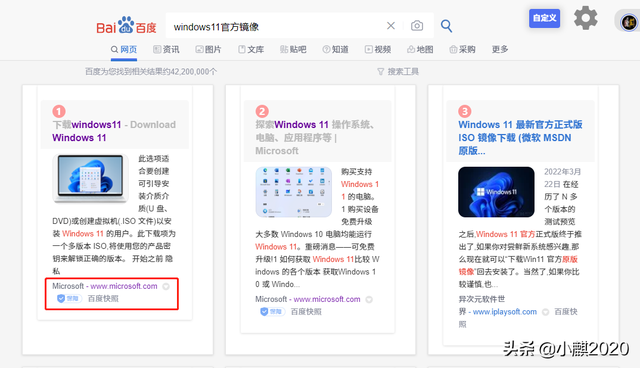
百度搜索结果
微软官方提供三种下载方式
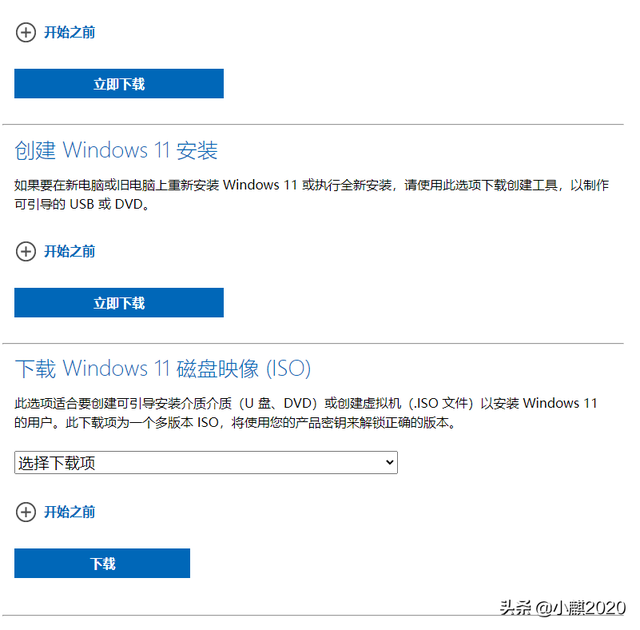
1、Windows 11 安装助手
这是安装在前使用的设备上安装的 Windows 11 的最佳选项
2、创建 Windows 11 安装
如果要在新电脑或旧电脑上重新安装 Windows 11 或执行全新安装,请使用此选项下载创建工具制作可指导的工具 USB 或 DVD。
3、下载 Windows 11 磁盘映像 (ISO)
该选项适用于创建引导介质安装的介质(U 盘、DVD)或者创建虚拟机(.ISO 安装文件) Windows 11 的用户。
3、下载 Windows 11 磁盘映像 (ISO)
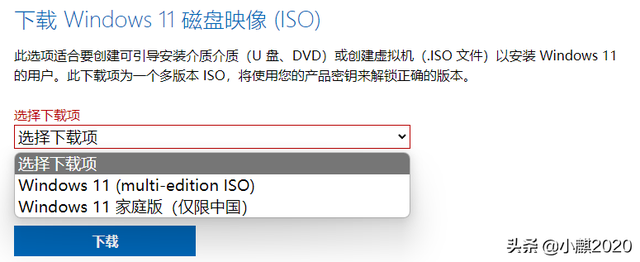 该选项适用于创建引导介质安装的介质(U 盘、DVD)或者创建虚拟机(.ISO 安装文件) Windows 11 用户。这个下载项是多版本 ISO,使用您的产品密钥来解锁正确的版本。小编建议使用第三种下载方式获得完整的镜像
官方提供两个版本
1.合一多个版本
2.家庭版(仅限中国)
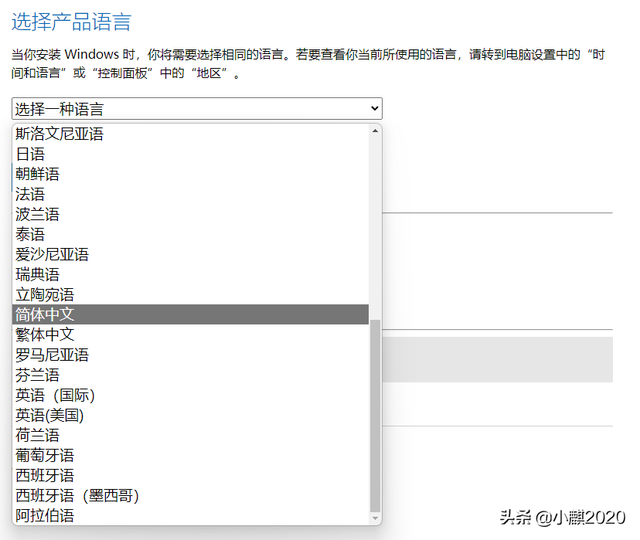 这里小编推荐下载多版本然后点击下载,选择语言
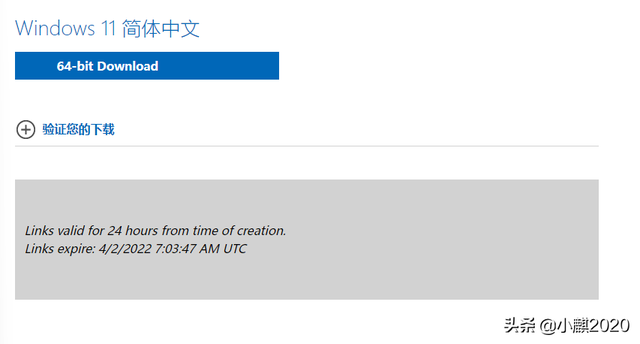 滑下去找简体中文,点击确认
点击 64-bit Download 下载64位版本windows11
接下来是漫长的等待
2、百度搜索MSDN
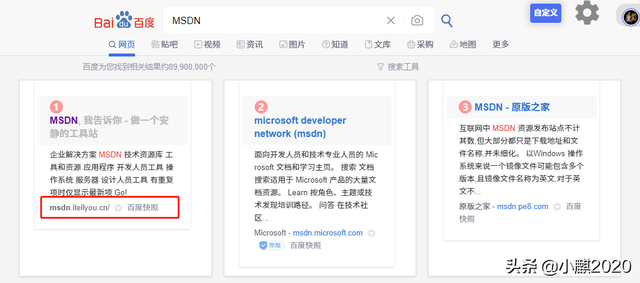 注意网址,避免踩雷官方网站:msdn.itellyou.cn
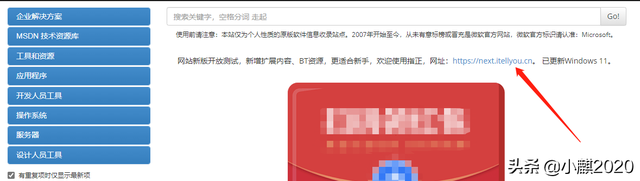 进入后是官方老网站,系统镜像只更新到windows10 需要获得新版本的1909版系统需要点击右上角的地址进入新站
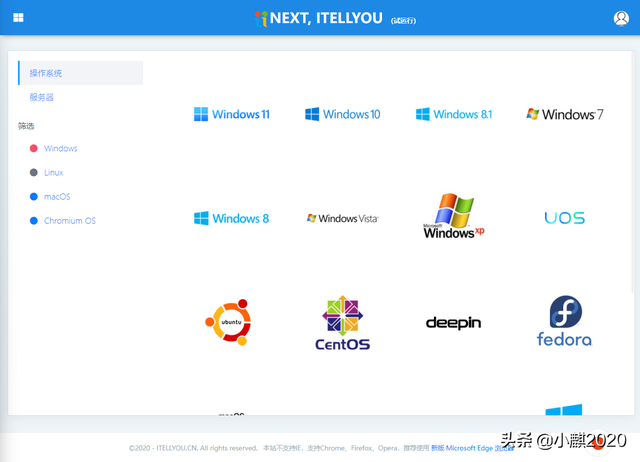
 进入新站后可以看到,系统镜像非常全面,有windows,windows server,Linux,MacOS,FYDEOS(安装系统电脑版)选择您想要安装的系统,这里我们以windows11为例
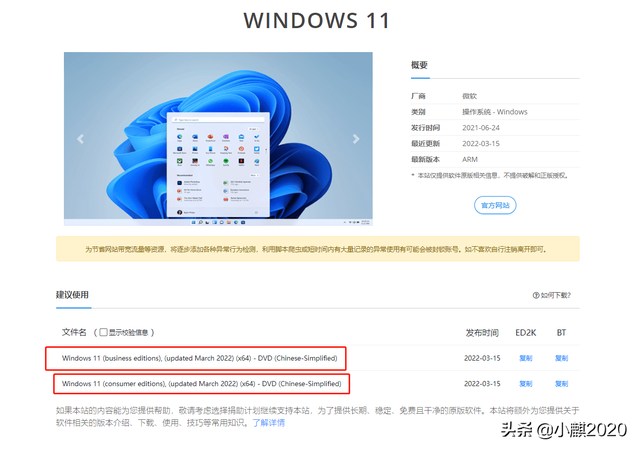 点击详细信息进入
这里有两个版本
第一个 Windows 11 (business editions), (updated March 2022) (x64) - DVD (Chinese-Simplified)
Windows 11(商业版) 年 3 月更新)(x64)- DVD(简体中文)
第二个 Windows 11 (consumer editions), (updated March 2022) (x64) - DVD (Chinese-Simplified)
Windows 11(消费者版),(2022 年 3 月更新)(x64) - DVD(简体中文)
我们现在可以使用消费者版本
有两种下载方式,
1:ED2K
2:BT种子
以上两种下载方式都可以借助迅雷等下载工具下载
三:私信小编:win系统下载
提前备份U盘和计算机中的重要信息
提前备份U盘和计算机中的重要信息
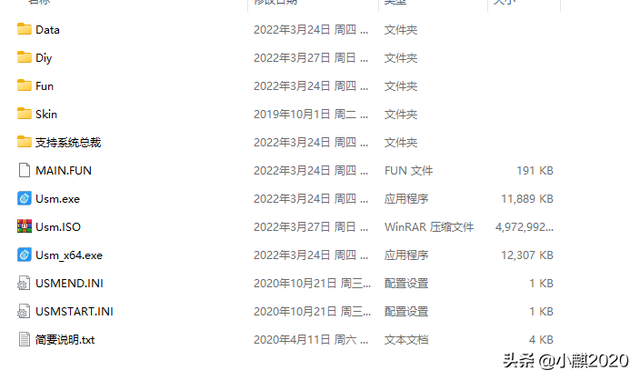 解压并打开下载的U盘魔术师
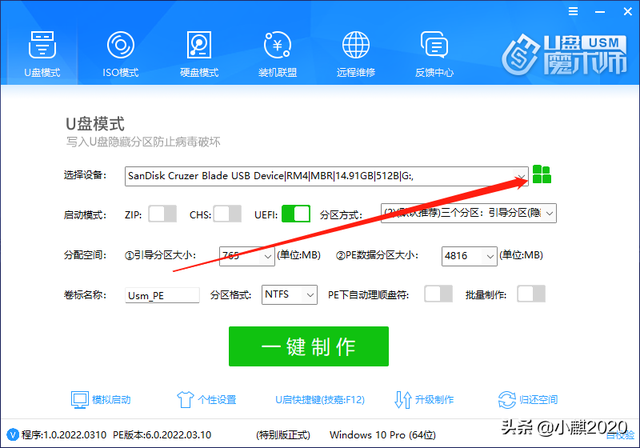
 主界面点击右上角的自定义,选择1-2个pe版本可以,不需要全选,减少PE系统占用容量
PE版本选择
选择后,我们点击一键制作
提前备份U盘中的重要信息
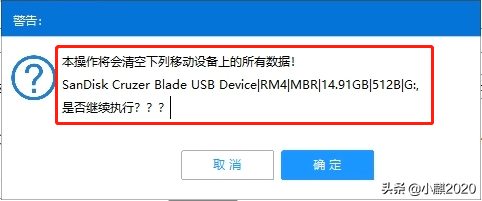 提前备份U盘中的重要信息提前备份U盘中的重要信息
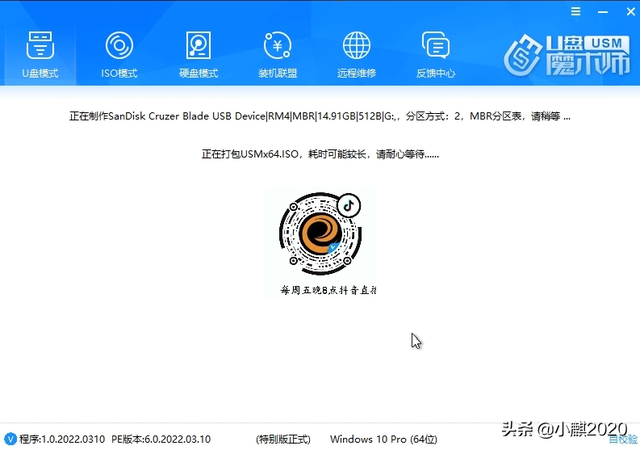 点击确定即可开始制作PE系统U盘
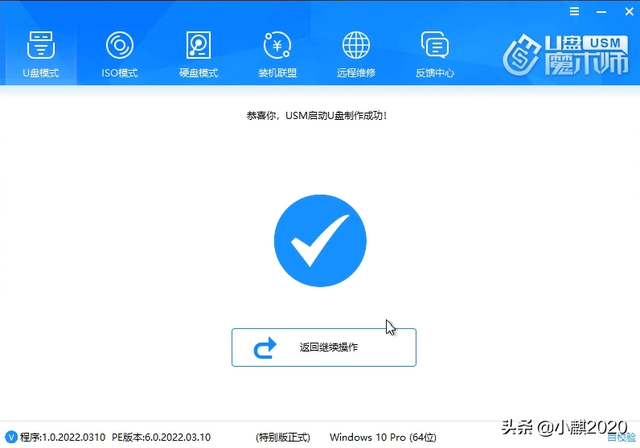 生产速度取决于U盘,直到提示制作完成
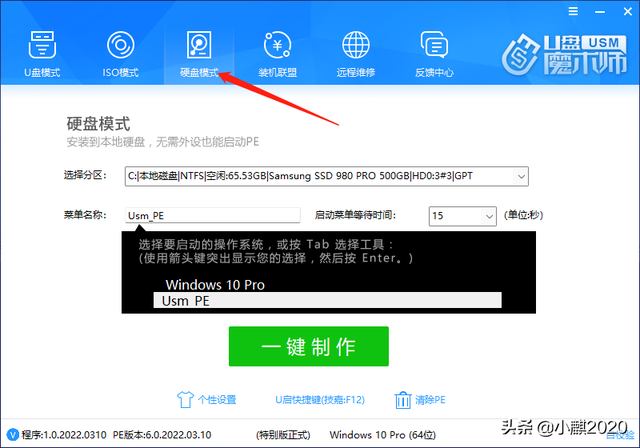 制作完成无U盘童鞋也可以选择硬盘模式PE系统安装在磁盘上
硬盘模式
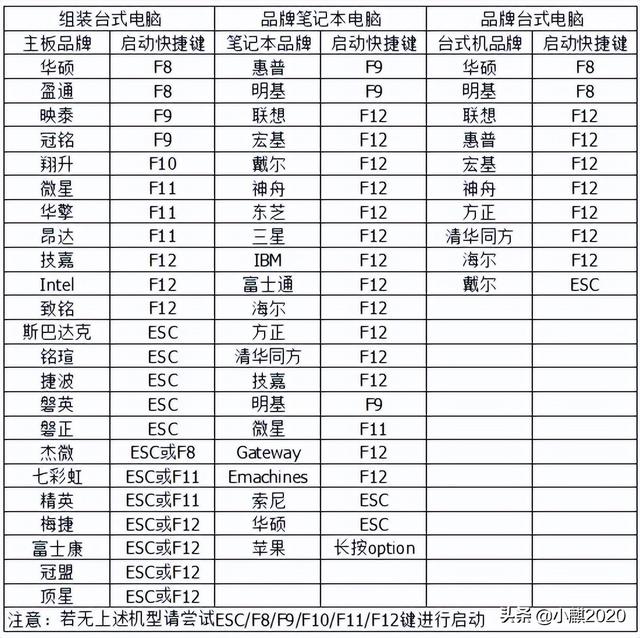 PE系统制作完成后,我们将下载 将系统镜像、驱动总裁、软件常用运行库、软件魔盒等复制到U盘备用接下来,重启计算机,按下华硕主板F8,技嘉主板按F12,微星主板按F11
 图片来到网络进入PE我们的计算机硬件信息可以在系统的右上角看到
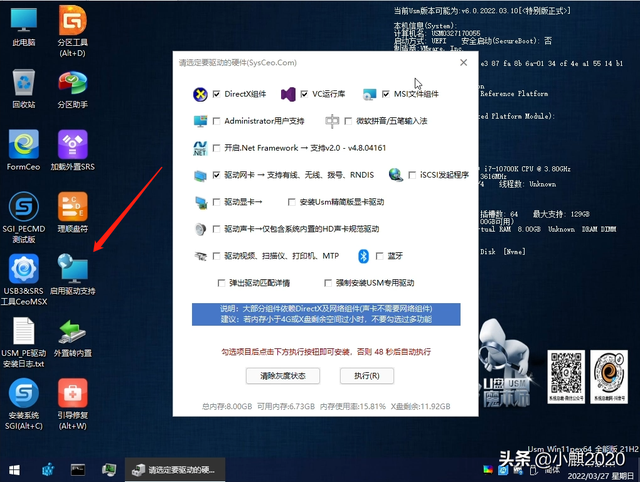 PE桌面如果有网络需求,可以点击桌面上的使用网络支持
使用网络支持
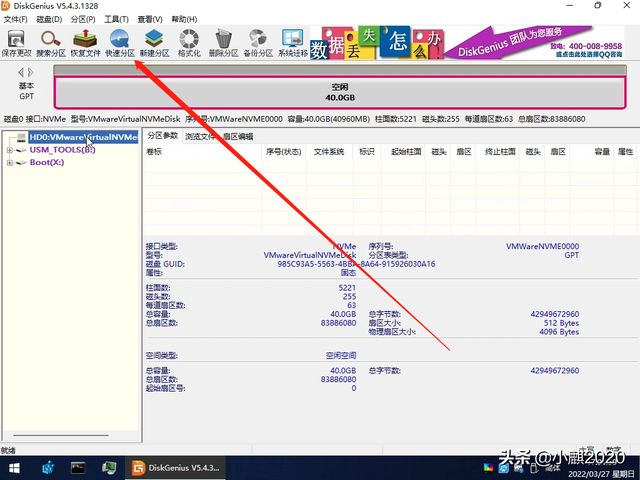
 假如你是新硬盘,无分区,直接点击上面菜单中的快速分区
分区界面
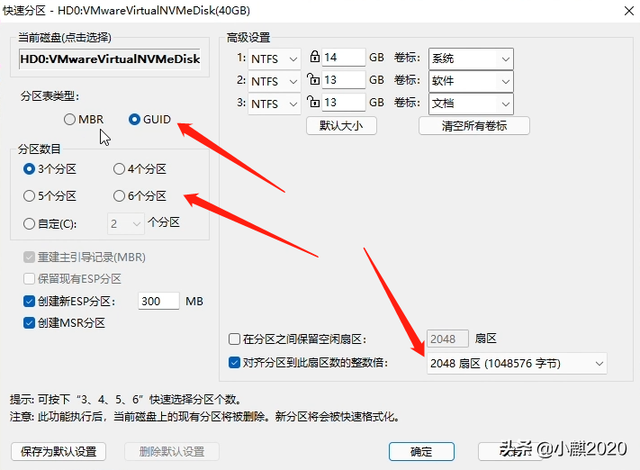
win10以上的系统选择GUID分区表,win7以下系统选择MBR分区表
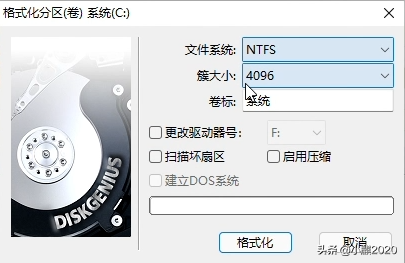 然后根据硬盘的大小选择分区的数量,最后将2048扇区改为4096扇区(4K对齐),点击确定开始分区如果您正在使用硬盘并且已经有分区,请单击现有系统磁盘(默认C磁盘,自行判断),单击菜单中的格式化和文件系统NTFS,簇大小选择4096(4K对齐),点击格式化
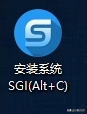 格式化磁盘格式化完成后,关闭软件,打开桌面上的安装系统
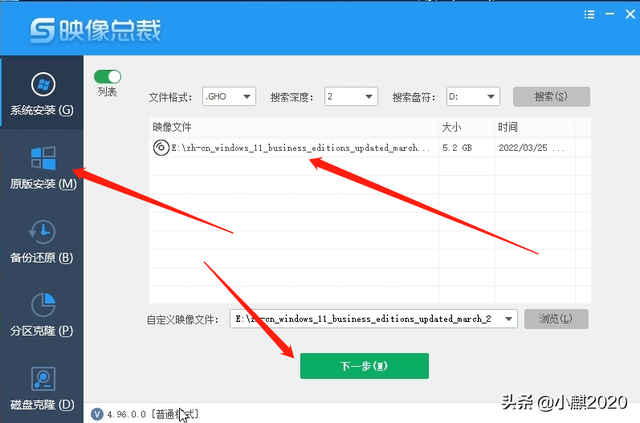 安装系统打开后,软件自动识别U盘中的系统镜像。您可以直接点击下一步或左侧的原始安装
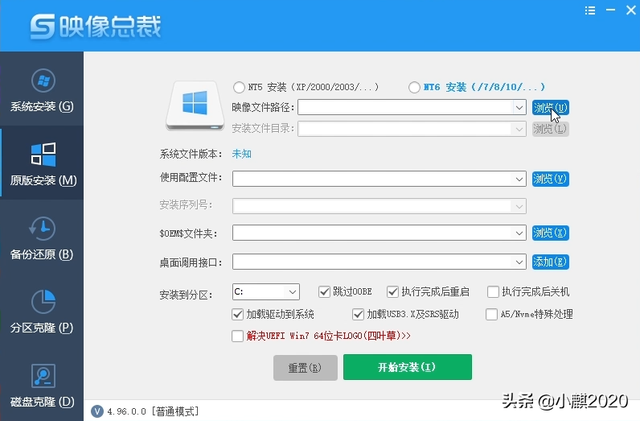 安装界面点击浏览后选择原始安装,在U盘上找到系统镜像
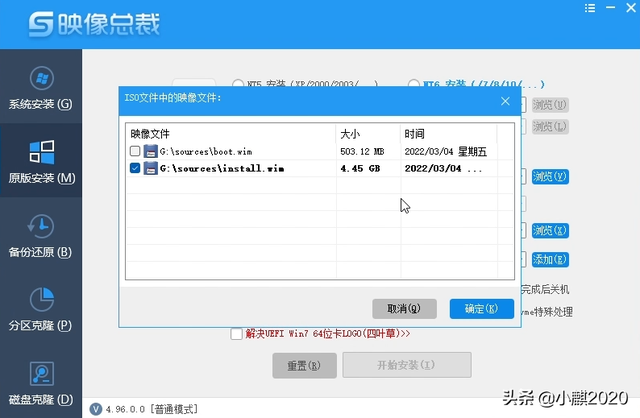 等待片刻后弹出选择
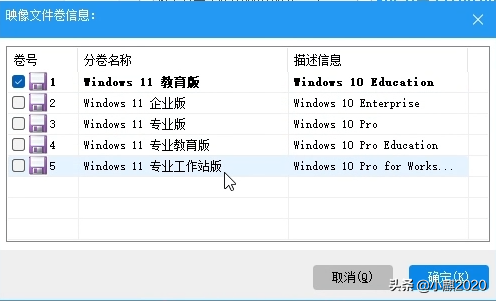 加载完成由于我们下载的多版本合一,这里提供了五个版本供我选择,选择个人需要的,点击确定
版本选择
让我们调整下面的选项
1.可以去除加载驱动到系统的选项(已经准备好了)
 2、跳过OOBE可跳过输入序列号、新账户等步骤)其余默认,然后确定
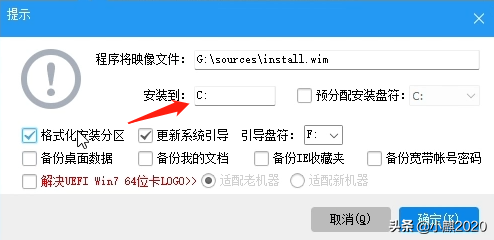 弹出窗口后我们注意看一下安装到那个盘符,不要选错盘符了,然后确定即可
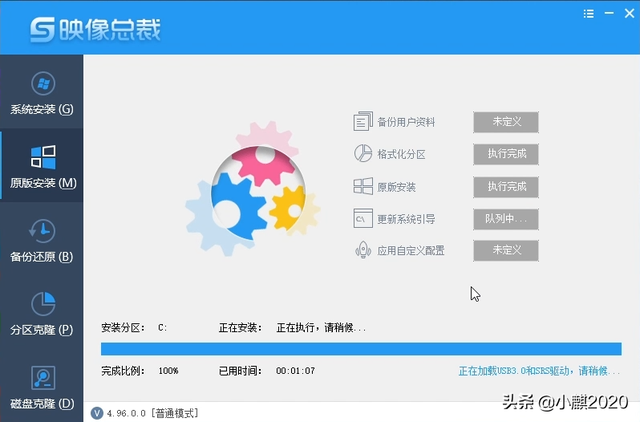 接下来是等待安装5分钟左右(取决于U盘和硬盘的速度)
 安装完成后自动重启,耐心等待
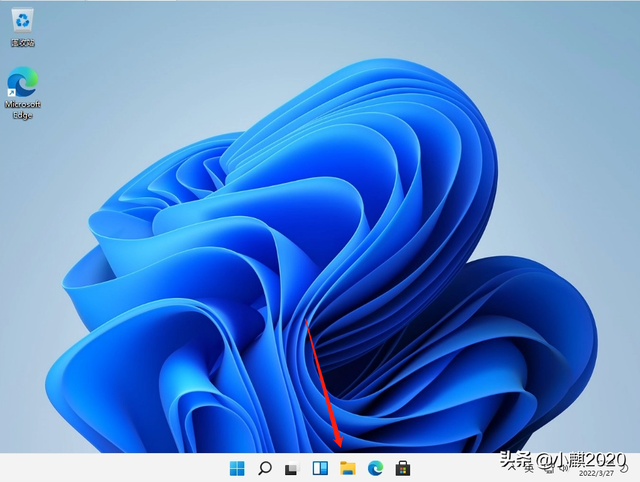 在进入桌面之前,我们点击下面的按钮,打开电脑,找到你的U盘
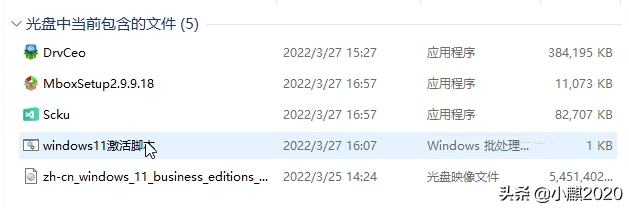 打开驱动总裁,关键驱动安装系统
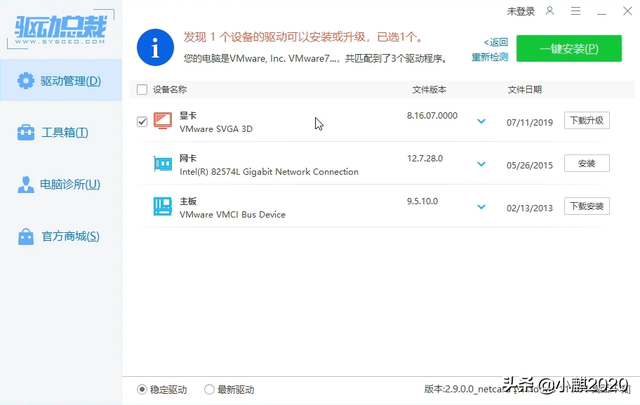 打开软件点击一键安装即可
 驱动总裁驱动安装完成后,我们软件常用运行库ScKu,安装系统依赖于文件
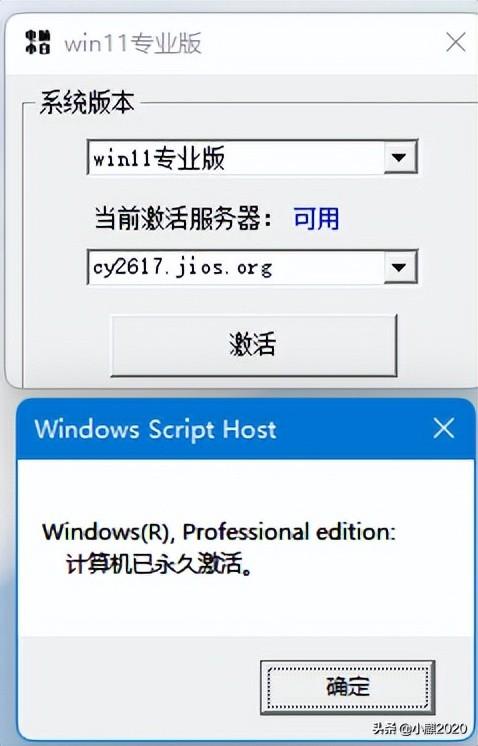 在文件安装完成后,我们打开系统激活软件,激活系统私信小编:系统激活
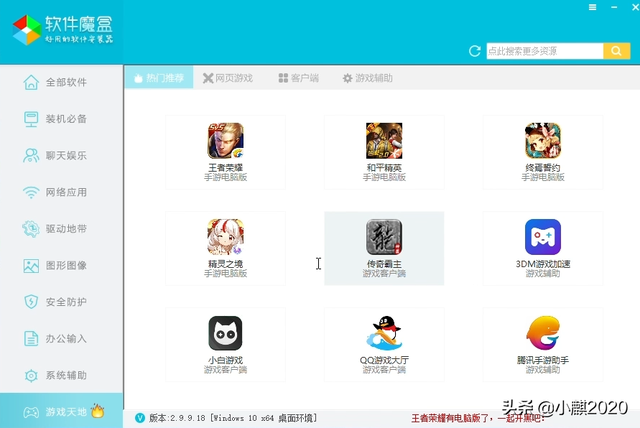 等待激活后,我们重新启动电脑,到目前为止是一个全新的windows系统安装完成后,我们重新启动电脑,再次打开软件魔盒,选择您需要的软件安装软件魔盒关注我,视频教程